If you would like a printed copy of any of our back issues, then they can be purchased on Farm Marketplace. You can also download the PDFs or read online from links below.
-
How To Start Drilling For £8K
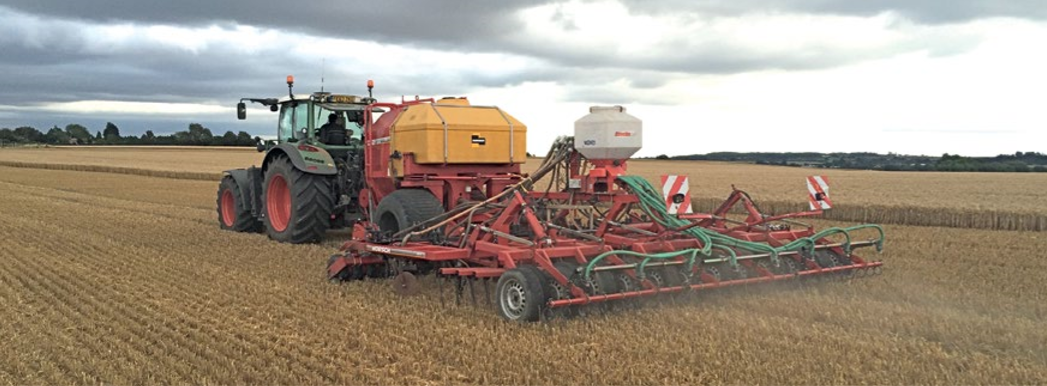
Clive Bailye’s seed drill of choice is his 6m John Deere 750A , which has been used exclusively for 3-4 seasons. Last year, with an increased acreage, the founder and publisher of this Direct Driller magazine thought a second seed drill was necessary. Having just the one machine was a risk and in a difficult season would mean drilling was delayed. He looked around and found a good condition Horsch CO6 tine drill advertised in Germany.
Words and pictures by Mike Donovan
After delivery he rebuilt the coulters to a narrow profile so as to reduce soil disturbance. He says the tine drill is very useful driling after straw crops such as osr and also through the straw on second crop cereals.
Buying the drill from a German farmer was not particularly complicated, and provided him with a higher spec machine than Horsh sell in the UK. The seed dart tyres are much wider, and the machine is fitted with blockage monitors as well as full width front packers and also a liquid fert application system.
A sheaf of photos were taken, and Clive then asked for some of specific parts to show wear. The deal was done at under £5,000 which Clive says is the market value of these machines which are too large for small farmers to buy. Original owners like to buy new and sell when the machine is still in good condition.
Narrow tines with wear tiles
@Clive knew he wanted to make changes, substituting the Horsch tines and coulters for something far narrower, and has ended up getting his own design of tine made, which has a wear tile made from Ferobide, far harder than tungsten. The drill is on the farm primarily for osr and 2nd crop cereals drilled into chopped straw and the 25cm spacing is okay for these crops.
Comments on Clive’s on-line forum, TFF, said the drill many not be so good with beans, as the slot is a mere 12mm wide. And in barley the spacing may well be too wide as it needs to be thick. Clive points out that the seed pipe can actually be a bit wider than 12mm as it is in the shadow of the point. It would be good to have the option of using it for beans.

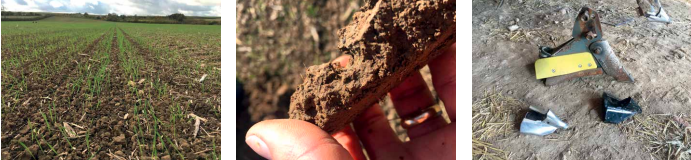
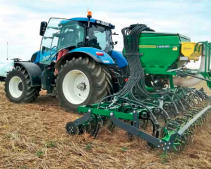
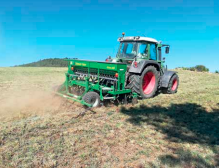
Above left: The cheap CO6 is being calibrated ready for its first outing

Above right: The adapted Horsch is being filled by the home built drill logistics trailer with seed and liquid starter fert.
Getting around the German instructions
The Horsch came, of course, with a control box and instructions in German. More on-line discussion revealed that English instructions were available on the Horsch website, and another explained that Horsch was sourcing some of these parts from Agton in Canada anyway. Zealman from New Zealand explained that the button marked with callipers should be held down for around 5 seconds. The menu is where you adjust the tramline sequence, valve layout and row numbers.
Ball hitch is a continental standard and provides a positive connection between tractor and drill

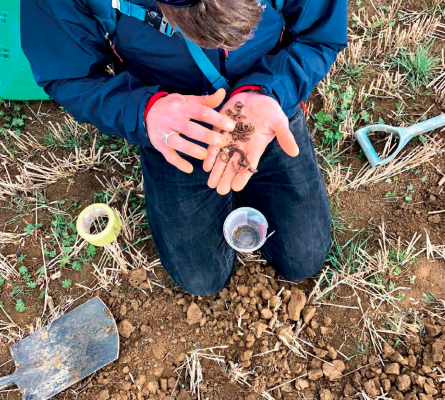
The Stocks Wizard has a rotor modified for Avadex which otherwise leaks everywhere
A Stocks Wizard is on the back of the drill and used for Avadex. Here again the knowledge of actual farmers is helpful. Alistair Nelson warned that the rotor and the surrounding shroud need to be changed, and he got good advice “from Rick at Stocks”. Clive has the same setup on the 750A and says that the Avadex leaks everywhere unless the modification is made. The drill was acquired and modified in 2016 and the results have been excellent.
The machine went through the residue without many problems and having the second drill has meant more timely planting. Clive has shown that moving into No-Till is not the expensive exercise so many farmers think it might be. The total cost, after modifications which included replacing all tines and coulters, was under £8,000.
Author Mike Donovan writes: we have featured a number of home made direct drills in @Practical Farm Ideas, and are always interested in seeing more. Please contact mike editor@farmideas.co.uk or 07778877514.
-
Companion Copping Boosts No-Till Profits, Soil Health
By Mark Parker posted on June 1, 2013 | Posted in No-Till Farmer USA
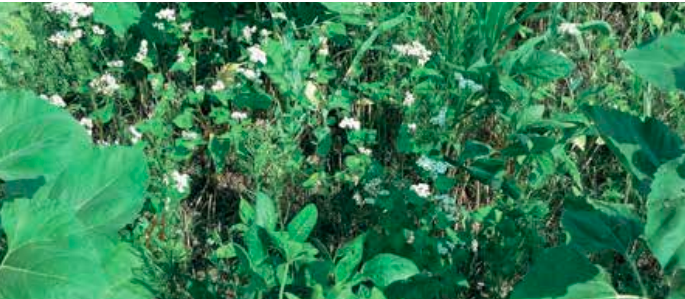
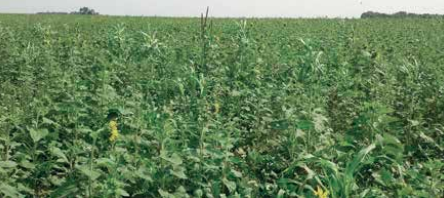
Growing double-crop sunflowers with multiple species has reduced inputs and enhanced primary crop health for Kansas no-tillers Robin and Kelly Griffeth. Double crop sunflowers planted with companion crops have a triple payoff for Jewell, Kan., no-tillers Robin and Kelly Griffeth.
With 2 years of companion cropping under their belts, the Griffeths are harvesting a more profitable sunflower crop, improving their soil and benefitting the subsequent crop in the rotation. The north-central Kansas farmers follow their hard red winter wheat crop with sunflowers intermixed with as many as nine different companion species, each selected for specific attributes. Continuous no-tillers since 1995, Robin and his son, Kelly, operate 3,700 acres as they raise corn, soybeans, wheat, grain sorghum and sunflowers. They were already believers in cover crops when an unplanned “experiment” revealed companion-crop potential.
“It was a fluke, really,” Robin says. “I was planting a field of buckwheat in July 2011. I had about 4 acres left and not enough seed to finish. I hate blank spots, so I mixed up some leftover sunflower seed, winter peas, five different clovers, canola, chickling vetch, safflower and a couple of different radishes — just to bulk up the volume enough to finish.” To their surprise, the sunflowers in the companion mix yielded well, without insecticide, herbicide or additional fertilizer. “We learned a lot by watching that 4-acre patch and decided this was something we needed to research a little further,” he says.
Designer Seed Mix
Kelly came up with a companion mix for the following year — common vetch, chickling vetch, spring forage peas, winter peas, cowpeas, crimson clover, oilseed radishes, purple-top turnips, buckwheat and sunflowers. At their normal rate of 21,600 seeds per acre, sunflowers made up only about 10% of the mix. Buckwheat had the largest number of seeds per acre at 64,800, with the other species ranging from 12,500 to 17,000 — for a total of 206,924 seeds per acre. The sunflower companion mix is planted as soon as possible after harvest, generally late June to early July.
The Griffeths had been planting double-crop sunflowers in 15-inch rows to achieve a quicker canopy. That meant planting at higher populations that depressed yield. What they wanted was a quicker canopy at normal seeding rates. Using their White 6531 31-row planter — which has Keeton seed firmers and Thompson closing wheels, and is set to 15-inch spacings — they planted sunflowers in 30-inch rows with the companion mix planted in the centers as a row filler, nitrogen producer and beneficial-insect attractant.
A Great Plains CTA-4000HD drill has also been used to plant the sunflowers and companion mix in 7½-inch rows, and the Griffeths continue to experiment. In the past 2 years, they’ve planted nearly 1,000 acres of double-crop sunflowers and companion species with the planter and, last year, drilled 54 acres. “You have more control with the planter, but we’re asking ourselves if we really need a picket-row stand,” Kelly says. “As long as we get the desired number of sunflower plants, and they’re fairly well dispersed, it seems to work fine — it’s more like mimicking Mother Nature.” Seeds are planted 1½ inches deep, the optimum depth for sunflowers. This year, Robin and Kelly are going to mix all of the seed together — including the sunflowers — in the planter boxes. They don’t expect a perfect stand, but believe using a soybean planter plate and optimum air pressure will produce good results.
Controlling Weeds
A burndown herbicide is applied after wheat harvest, and 4 to 5 weeks after emergence, the Griffeths spray Select to control volunteer wheat. “The companion crop does an excellent job of controlling weeds, and we may get to a point we don’t use any herbicide. But this is wheat country, so we have to control volunteer wheat,” Robin says. “We may add pearl millet because it will jump up quickly and out-compete weeds, then it’s killed by the Select, allowing other species to take over.” Regarding moisture competition in a 25-inch annual-rainfall environment, Robin points out that sunflower roots extend much deeper into the soil than roots of the companion species.
At harvest, the Griffeths use Lucke Manufacturing sunflower pans mounted on a rigid Case IH head, a system that has worked well. “Most of the taller plants are warm season and have been killed by frost by the time we harvest the sunflowers,” Robin says. “If a species is going to cause a harvest problem, it should be left out. The beauty of the flowers we plant is they get 6 or 7 feet tall. “I wouldn’t recommend this with a dwarf sunflower. You have to choose varieties and companion species wisely.”
Reduced Inputs
For the Griffeths, companion planting eliminates the need for an insecticide and a broadleaf herbicide — as well as an 80-pound-per-acre nitrogen application. Prior to companion cropping, a pesticide was used to control head moths. Now, the companion mix attracts beneficial insects — bees, predator wasps and lady beetles — that have successfully replaced the pesticide. At a cost of $15 to $20 per acre each for the insecticide and herbicide applications, Kelly says the companion-crop seed mix is basically paid for. The entire seed mix, including sunflower seed, costs $65 per acre — about the same cost as doublecrop soybean seed.
The primary profit impact of this comes at harvest time, Robin says. “Yields are comparable to sunflowers without a companion crop — they’re certainly not less,” he says. “The real profit advantage is grain quality. The sunflowers have better plant health, with far less insect damage and that gives us better oil content. “We’re paid a premium for high oil content, and with the companion crops, the oil premium has been the highest we’ve ever received.” Rental Income In addition to higher yields for grain sorghum and corn following sunflowers, the Griffeths may add to double-crop income by renting companion-cropped fields for winter grazing.
Kelly has taken the lead on identifying plants that contribute positively to the mix. “You have to do your homework to find out what companion species will work together,” he says. “If you look on the Internet, you’ll find most of the information comes from gardening Web sites. “You can find out which species grow together, and those that have a negative impact on each other. It’s important to avoid antagonistic combinations. You don’t just throw a random mix out there.” The Griffeths have grown doublecrop, food-grade buckwheat and believe it’s an important component. Kelly says buckwheat makes phosphorus more available for the following crop, establishes quickly and attracts beneficial insects.
Companion Criteria
There is a wide world of other species from which to choose, Kelly points out. “All species have to satisfy two criteria,” he says. “They have to be compatible with the primary crop, not detrimental. “And they have to help us accomplish something we’re after — quick weed suppression, soil building, nutrient cycling and attracting beneficial insects.” Although they continue to assess species and mixes, Kelly says one thing is clear. “I’m not sure you can get too much intensity,” he says. “If there’s been an issue, it’s because the mix is not intense enough. We had some marestail pop up here and there, for example, and we felt it was due to the companion stand not being intense enough.”
Crop Insurance
Robin and Kelly plan to extend their companion-crop concept to corn this year. It will have to be on double-crop corn, however, since crop insurance will not cover the practice. “Making a profit is our primary purpose,” Robin says. “We take care of cash crops first, and anything we try has to pencil out. We’d love to try companion crops on full-season crops but, from a risk management standpoint, you don’t want to make an insurable crop uninsurable.” The Griffeths will plant corn in 30-inch rows with a companion mix of lupins, cowpeas and sunn hemp.
Soil Benefits The Griffeths also plant cover crops ahead of soybeans — typically cereal rye, oats, safflower and mustard, or other mixes. Continuous no-till with cover crops makes a positive soil quality impact, says Kelly. In addition to decreased compaction, reduced erosion and increased water efficiency, the Griffeths have measured rising soil organic-matter content. “We soil sampled a CRP field we’ve farmed for 3 years,” Kelly says. “Organic matter was 3.1% when we took it over and, 3 years later, it was up to 3.5%. That’s all from using cover crops and notill, and I think the companion cropping can have an even bigger impact.
-

Farmer Focus Steve Lear
A Great Year to Start No-Till……

This autumn has been a good one for progressing into no till. The weather had done any subsoiling that was needed by cracking out the soil to a depth of two foot in places. In late September I was getting a little worried. I had been told that late drilling doesn’t work very well with no-till. The fields hadn’t greened up at all and I was loathed to drill anything until we had killed off a flush of blackgrass and volunteers. Luckily for us mother nature was on our side and we have been able to establish crops into unmoved soils into November after a good flush in mid-October.
We have a large acreage of hybrid barley in the ground which looks well but will need an early dose of nitrogen when the winter ends to get it going in the early spring. Our wheat all looks very well. Since going to no till, we have upped the seed rates in winter wheat. I may have put on a little too much in some fields as we have seen very good establishment this year, in fact its probably better establishment compared to our old conventional system. On all our cereals we have put a small amount of liquid phosphate down with the seed to help improve rooting. I would in the future like to find a biological product to do this job.
Instead of applying fresh nutrients into the soil, it may be better to apply a biological product that could help break the chemical bonds in the soil or help the plants take up the nutrients more effectively. I’m on the search for such a product and will carry a few trials out next year. We have only used a minimal amount of slug pellets on cold north facing slopes. I imagine that the dry summer has meant a huge reduction in the slug populations on our ground. On top of this I have kept with my plan to not use any insecticides on the farm. I hope I can continue to do this when we lose Deter seed dressing. Even though the weather has been ideal for them, we only had a minimal number of aphids arrive on our cereal crops, I’m beginning to think they don’t like landing in stubbles but I may still be proved wrong.
The wheat variety that we have chosen this year is Nelson. It is a highgrade German milling wheat. It also has shown to perform well in organic systems. I am hoping that we can reduce the number of fungicide passes we need in the crop to help protect soil microbes better. It will be interesting to find out if its high untreated yield is due to its symbiotic relationship with mycorrhizal fungi or the fact that it has a huge flag leaf.
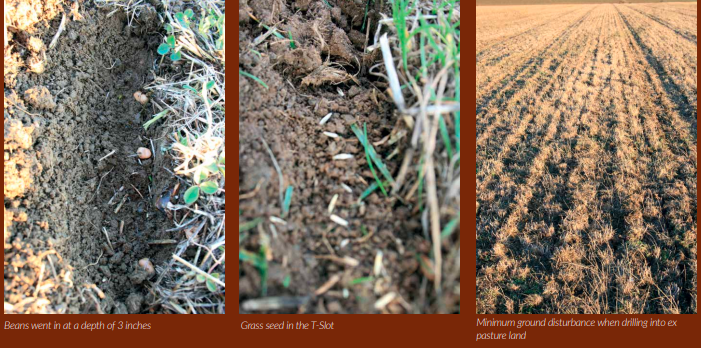
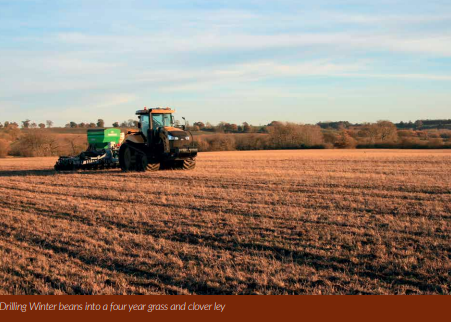
We have also drilled winter beans this year, which is a first for me. We sprayed out a four-year grass and clover lay and direct drilled the beans at the beginning of November. The white clover has remained in the crop as its fairly resistant to Glyphosate and we will use it as a companion crop for the beans. I’m hoping the two species will fix a lot of Nitrogen for the following wheat crop and improve the structure of the field as well as suppressing any weeds that come in the spring.
We have reseeded some pasture land this autumn with great success. I have read up on how they do this in New Zealand. The pastures were grazed down very tight and no fertilizer was applied to the fields. This was to limit competition from the existing sward. We direct drilled the fields straight into the existing pasture using a mix of tetraploids and diploids at about a 2/3rds rate. The cattle were left on the pasture until the new grass had chitted and was at risk of being pulled out of the soil (about 2 weeks later, but I think we could extend that). The cattle are allowed to graze as soon as the roots of the new grass has established and it’s not possible to pull new plants out the ground. I’m interested in establishing more diverse pastures next spring and using some herbal plants. With a more varied root depth I think we will be able to pull nutrients up from deeper, increase soil biology and keep some growth in the fields throughout the drier months.
With no cultivation to do we have been able to spend more time on sampling soils in the autumn. I’m starting to carry out a sort of soil benchmarking of our soils. As a bench mark, I am testing soil that has been in a natural cycle for many years. This comes from either under hedges or in small wooded areas. I’m hoping this will give me some figures to aim for in terms of microbial activity and organic matter in the soil. My samples are tested by NRM laboratories who offer a package called the ‘Soil Health Suite’. It contains all the usual tests as well as a CO2 burst test for soil microbes, an organic matter test and a soil textural classification. As well as these I am also slowly getting around the farm and carrying out worm counts, infiltration tests and slake tests. This will help to see where we have improved soils and were we need to do more work.
As well as the farm, I am still expanding my knowledge of how the soil works. It seemed a sensible step to become a member of BASE. I’m looking forward to meeting members and finding out how they have improved their farms and if there is anything I can bring back home from the meetings, I am sure there will be. Since joining I have watched the presentation on the BASE UK website from Dr Kristine Nichols, it’s worth the membership fee alone.
-
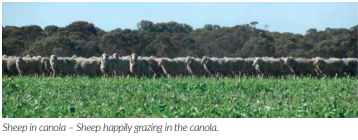
Grazing Cropped Land
The almost forgotten technique in the UK of grazing cereals is something being widely practiced across Australia in areas with widely varying rainfall levels. The Australian Grain Research and Development Council have produced a report titled Grain and Graze which sets out to evaluate the advantages and disadvantages of grazing a range of cash crops. We begin serializing this report over forth coming issues to explore what is currently an untapped resource.
In Direct Driller Issue 3 we started looking at the potential opportunities of grazing winter crops. One of the greatest downsides is the risk of potential reduction in grain production and value due to grazing. This is where we pick up our content on grazing winter crops.
The Possible Costs (the downside)
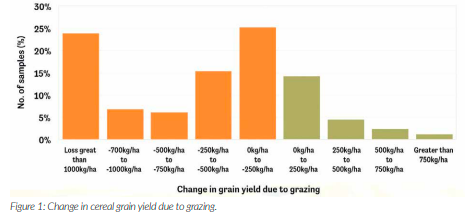
The greatest downside risk is the potential reduction in grain production and value due to grazing. Results from Grain and Graze and other experiments show a wide range of yield and quality responses to grazing, from large reductions in grain yield to no yield losses or even increases in yield. Reduction in grain yield Grain yield data from 2004 to 2013 was collected across 53 cereal trials and 246 measurements in Western Australia, South Australia and Victoria where a grazed and ungrazed comparison could be measured (figure 1). This included wheat, barley, triticale and oats. The results also include treatments where grazing was less than ideal, including grazing after stem elongation and when crops were under stress. These extreme treatments were imposed to appreciate the size of the yield and quality loss under adverse conditions.

Figure 1 highlights several key points:
• Cereal grain yield declined under grazing most of the time crops were grazed (78%), although the severity of the decline varied. The most common result was a yield decline of less than 250 kg/ha (25% of cases), with yield loss of between 250 kg/ha and 500 kg/ha occurring a further 15% of the time.
• Increases in grain yield were recorded in 22% of cases. The most common increase was up to 250 kg/ha although some larger gains were also recorded. The main reasons for the gains were attributed to reductions in lodging and less leaf disease, both a consequence of the removal of early growth by grazing.
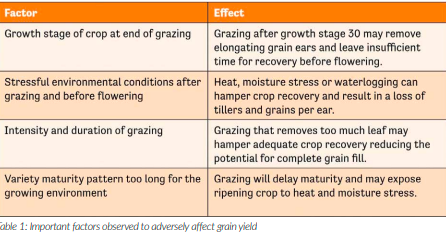
• Large losses in grain yield were recorded (24% of cases). Four factors are believed to contribute to the large yield decline (table 2).
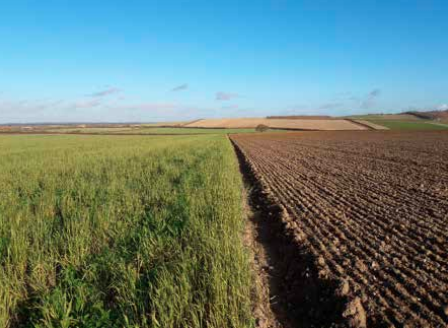
Canola
Grain data for grazed canola was limited. Most of the information was collected from Southern Victoria when the crop was sown at the conventional sowing time (late April to early May). Dry matter production was generally lower than cereals sown at the same time and the crop was slower to recover from grazing. This resulted in severe yield penalties. Best practice sowing guidelines for canola are to sow in Late March to early April, but this may be difficult to achieve in some areas because of stubble burning restrictions and weed control.
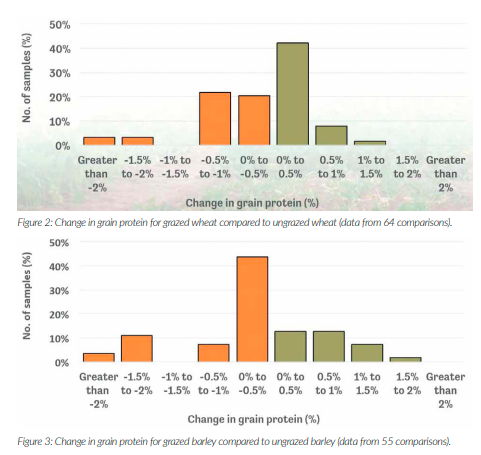
However, the availability of new canola varieties with strong winter habit provides the opportunity to sow by taking advantage of out of season rainfall (October through to February), where the crop is treated like a brassica fodder for grazing before being locked up and taken through for grain. Changes to grain quality Grazing resulted in a variable response to cereal grain quality. In some trials grazing improved grain quality characteristics, in other trials grain quality declined. The general conclusions from the spread in results are discussed. Protein Grazing did not affect the average grain protein in wheat but did with barley. Of the 64 wheat results examined, the average change in wheat protein from grazing was -0.1%, with a similar number of increases in protein recorded as decreases (figure 2).
The grain protein response to grazing for barley was different, with grazing more commonly resulting in a decline in grain protein (65% of the time). The average decrease across all trials for barley was 0.3% (figure 3). The reasons for the decline in grain protein with grazed barley is not obvious. The results used in the analysis were collected across many years, using different varieties, nitrogen applications and time of grazing. This makes it difficult to identifying the possible reasons for changes in grain protein. The only loose association from the information is between grain yield and protein. It appears if grain yield is increased because of grazing, which happened in 40% of all the barley trials, then grain protein decreased (i.e. was diluted).
Grain size
Grain size in wheat and barley was generally not affected by grazing. Of the 54 comparisons with wheat and 42 comparisons with barley, slightly more than half the observations showed a reduction in grain size due to grazing. The average reduction in wheat was 1% and 2% for barley. The limited (less than 10) observations of grain size for triticale and oats showed similar responses to grazing as wheat.
Screenings
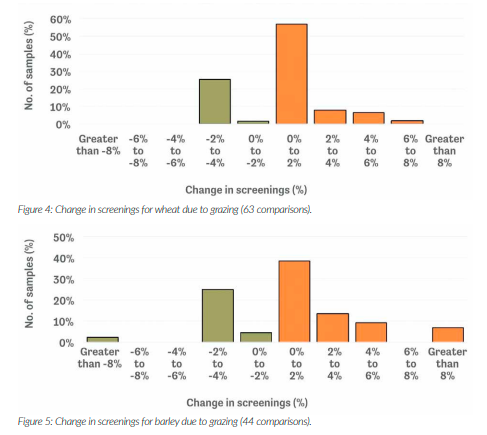
Screenings increased slightly for both wheat and barley as a result of grazing. More than 73% of wheat and 68% of barley comparisons showed an increase in screening compared to no grazing (figures 4 & 5). The average increase in screenings for wheat was 0.9% and 1.4% for barley. There was a slight correlation between increasing screenings and a reduction in yield after grazing.
Calculating the value of grazing crops
Calculating the value from grazing winter crops can be challenging because while there are immediate benefits through feed for livestock, the flow on effects are often more difficult to quantify. These flow on effects may include potential grain yield loss from grazing, building a ‘feed wedge’ because pastures can be spelled and making different livestock management decisions. The gains are realised within the farming system and not simply by comparing the potential loss of grain yield with the livestock gain when the crop is grazed.
Modelling undertaken by the CSIRO2 would suggest the potential benefits to whole farm profitability are very significant, in the order of AUS$100/ ha to AUS$200/ha. Attention to variety selection, early sowing, adopting best grazing practice and increasing stocking rate are all required to achieve this potential. Individual farm considerations such as weed and disease issues, chances of favourable climatic conditions to enable early sowing, adequate farm infrastructure and cash flow to run more livestock and the manager’s position on risk may temper these potential benefits.
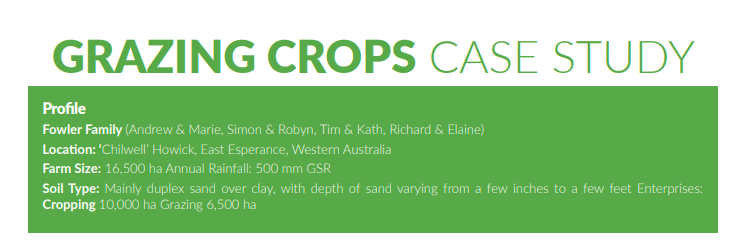
The Fowler family from East Esperance in Western Australia started grazing crops in 2008 as a trial before fully incorporating into their farming system in 2010. In 2011 they cropped 10,000 ha of wheat, barley and canola, of which more than half of that was grazed. Andrew Fowler said grazing crops had delivered a major lift in the profit of their operation and that it was one of the best innovations they had implemented on the farm. “We first tried it to make the pasture phase of our rotation more profitable and comparable with the cropping phase,” Andrew said. “Previously we were looking at about $200/ ha gross profit for livestock which wasn’t much when we compared it to cropping, which was about $500/ha.
“We needed to lift our stocking rate to increase our return per hectare to make grazing worthwhile, as well as to help recover some of the fixed c o s t s associated with livestock and m a i n t a i n i n g p a s t u r e paddocks.” By using grazing crops, the Fowlers have now managed to lift the pasture phase to $350/ ha gross profit and nearly double their stocking rate from 10 DSE (dry sheep equivalent) to 18 DSE. In 2010 they increased their net profit by $500,000 by growing an extra 1,000ha of crop and retaining their livestock numbers. “Grazing crops is a really important tool in matching the supply of feed to livestock demand, and it has helped the farming business to harness the synergies between livestock and crops” Andrew said. “As a result we have had some great benefits with liveweight gains, higher stocking rates, cost savings, crop management advantages and more: all with little impact on crop yields at harvest”.
Benefits of grazing crops
“Grazing crops significantly reduces the levels of disease in barley (especially powdery mildew) when compared with ungrazed crops, which eliminates the need for an early fungicide spray,” Andrew said “In our canola crops, the height of the crop is shortened which makes swathing and harvesting a lot easier. In 2010, the height of the crop dropped by a foot as a result of grazing.” Yield and quality are not compromised as a result of grazing. In 2010 the Fowlers’ highest yielding paddocks were grazed, a wheat heat paddock went 4.7 t/ha and a grazed canola paddock yielded 2.1t/ha. The quality was excellent with 45% oil and 0.6% admixture.
Andrew said an additional benefit is less grain is required for supplementary feeding. We wouldn’t be able to maintain our livestock numbers if we didn’t graze our crops. “We would have to feedlot the sheep and cattle, or decrease our numbers which would reduce the profitability of our pasture phase and this was the main reason for heading down this path in the first place”. The Fowlers have had excellent live weight gains from grazing crops. For sheep, they average about 300 grams/ head/day and 1.8 kilograms/head/day for cattle. In 2011, their drop of crossbred Merino White Suffolk lambs only spent five days grazing pasture before the first draft was sold on 8th August at 18.1 kg for $118 a head. (The rest of their lives were spent grazing crops.) The ewes lambed in stubble before grazing a barley crop at the three leaf stage. The lambs were weaned at six weeks, the ewes were sold, and the lambs continued to graze crops.
Challenges
Andrew said at the start, the hardest part was to open the gate and let the stock into a good looking crop, but he was amazed how quickly the crop recovered. Other challenges the Fowlers have faced and, that Andrew stressed, were very important for the system to work, include:
• the early seeding of crops
• good weed control
• a good rotation.
• providing ad-lib straw for livestock, and
• not over-grazing the crops, with the best results achieved if there is some biomass left after grazing.
Crop stages and management
Livestock are removed from crops at the first hollow stem (around Zadocks GS 30) in cereals, and with canola, stock are removed when the buds are about 10cm high and there are a few leaves left. “The best results are achieved when you don’t take all the biomass away – you can graze to the white line (when there is no green left) but we have found that the crop is a lot slower to recover if you do this,” Andrew said. They have found the early sown crops handle grazing well, but the flowering date of the later sown crops is pushed back a bit too far (and the yield affected) without careful grazing. The Fowlers finish grazing most paddocks by end-July and the latest date is early-August. After livestock are removed, the Fowlers immediately spray with a Nitrogen (N) application.
Once a new leaf has fully emerged, barley crops are sprayed with a broadleaf and powdery mildew spray, and Roundup Ready Canola is sprayed (being careful to manage withholding periods if crops are to be grazed postspraying). The Fowlers admit the big advantage for them is the lack of frost occurrences in the region, which allows their crops to recover quickly.
Pasture tips
The Fowlers continue to strategically rest and graze their pasture paddocks while grazing crops. “We don’t lock up our pasture paddocks otherwise the cape weed gets away on us,” Andrew said. “If we continue to use our pastures, we find that it increases the quality and quantity of feed for August when we start full time grazing.
-
Using Temporary Electric Fencing To Graze Crops Or Cover Crops
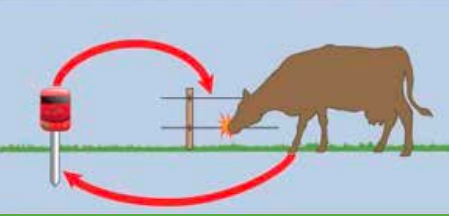
The main thing to understand is that an electric fence is a psychological barrier for animals. The initial electric shock they receive means they are deterred from approaching the fence again. Therefore, how a fence is erected and the speed with which it can be moved is critical when consider what is important in terms of using them to help graze crops. In this guide we will with the help of Rappa introduce the elements of a fence and what you would need to be able to graze your crops (so you just need to add the animals).

As you are already probably aware, an electric fence is made from three elements:
Energiser – generates a regular pulses of electrical current
Wire – conducts the current
Earth – returns the current back to the energiser.
Energisers
The energiser converts electricity from mains supply or batteries into high voltage pulses of electric current at one second intervals, that travels along the fence. The type of energiser you need depends on how close the fence is to a mains electricity supply, the fence length and the type of animals you want to control.
Wire
There are many variations of wire suitable for electric fencing.
• Steel wire, either single or multistranded, is strong, durable and highly effective at conducting electricity, so the animal receives a greater shock when touching the fence. Steel is heavier than other alternatives, and is best used in permanent or semipermanent fencing where you need good tension on the wire.
• Polywire is lighter than steel. It is made from UV-stabilised plastic twine with three or more strands of stainless steel wire woven into it. Polywire is designed for temporary fencing and stripgrazing, although the more substantial polyrope can be used for permanent fences.
• Polytape and polybraid consist of stainless steel wires and plastic strands woven into a ribbon, available in a range of widths and colours that can be used for permanent and temporary fencing. Both are highly visible, but can be vulnerable in high winds..
Wire Reels
A reel allows you to unroll the fence wire evenly without creating potentially damaging kinks, then roll it up again neatly for reuse. By locking firmly onto a reel post, the reel keeps the fence wire taut. We offer two kinds of reels:
• Rappa Reel – for use with our Rappa Fencing Machines
• Hand Reel – for manual fencing
Posts
Permanent fences use timber posts to support the wire, while temporary fences rely on metal or plastic posts, available in different heights and spacings, depending on the stock you want to fence. In addition, anchor posts are used for temporary fencing in the corners or at the beginning of a fence, and help keep tension on the fence wire. Temporary fences also require a reel post at the end to hold surplus wire and keep the line taut.
Insulators
Insulators keep the fence wire from touching the supporting post or stake, preventing electricity leaking back to the ground. Anchor or endstrain insulators also take the strain of the wire at the end of the fence line or at corners. Polyposts are made of non-conductive plastic therefore separate insulators are not required. Good quality insulators should be smooth and dry off easily to prevent moisture collecting in nooks or cracks causing current to leak, creating an ‘arc’. Arcing, which produces a regular clicking sound, reduces the effectiveness of the fence. Offset insulators give a longer life to permanent fencing by holding the electric wire a short distance away from a new or existing permanent fence, stopping animals causing damage by biting, leaning or rubbing.
Earth stakes
Earth stakes are inserted into the ground and attached to the energiser. They ensure the power returns through the ground and back to the energiser when an animal completes the circuit by touching the fence.
Fence Tester
All electric fences need regular maintenance. You should regularly measure the power on the fence lines using a fence tester – or voltmeter – that will help locate any problem areas where power is leaking away.
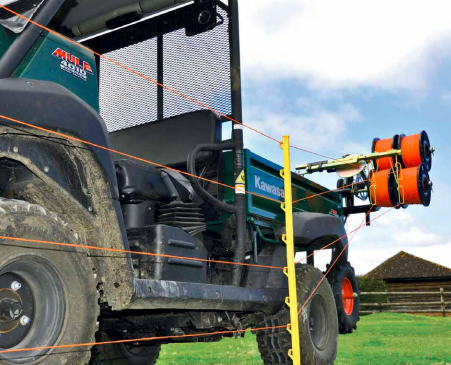
Electric fencing machines
While fences can be put up manually, there is certainly skill involved. Automating the process with a machine, will help keep the wire taught and visible and reduce the chance of accidental grounding. Electric fencing machines, also known as winders, are used to erect and dismantle up to four lines of fence wire quickly and efficiently, perfect for strip or cell grazing where fences are moved frequently – a typical 600m electric fence can be put up in 20 minutes and dismantled in 10. Rappa’s fence winders have been developed and built in the UK for the last 40 years, and now include a range of six machines, from manual-push barrow winders for small or inaccessible areas, to larger models that fit onto an ATV or RTV – from human to horse power! The RTV Winder is designed to pick-up on the left hand side so the fence can be dismantled without leaving the seat of the cab. The largest in the range, the Trailer Winder, can fence up to 5km in one hit, again this can be specified to pick-up the fence on either the left hand or right hand side. A complete range of fence packs have been developed to compliment the fencing machines.
Installing an earth
First, work out how many earth stakes you need. Larger fence energisers exerting more power, or longer fence lines with higher leakage, require substantially more earthing. As a rule aim for 1 metre of earth rod for every joule of energy, ie. a 5 joule energiser will require 5 metres of earthing. You need to link your earth stakes together with underground cable, which is then connected to the energiser’s earth terminal. Your earth stakes should be at least 4 metres apart, and kept well away from domestic earth systems, and at least 10 metres distance from any other earth installations, such as those used by telephone or electricity supply companies.
Never use steel water pipes or steel-framed buildings as an earth. You also need to place your earth system in a consistently damp site. In areas where the soil is very dry, or there is a lot of sand, peat, gravel, snow or frozen ground, you can boost the efficiency of the stake by watering the ground in dry weather or increasing the number of earth stakes. You can also run an earth return wire parallel to the fence line, and connect it to earth stakes at regular intervals. Bear in mind that an earth system installed in winter, which is adequate for winter conditions, may not be suitable for summer; this may explain any substantial loss in power on your electric fencing over the summer months.
Safety in electric fencing (the things you should and shouldn’t do)
Properly installed and maintained, electric fencing is safe for humans and animals. However, you must adhere to the following:
• Never electrify barbed wire or any other material that could entangle an animal or person.
• Never attach more than one energiser to a fence. Maintain a gap of at least 2 metres between separate electric fences.
• Put up warning signs at intervals of no more than 10 metres on any electric fence installed along a public path or highway, or at any other point where people may encounter the fence.
• Where your fence intersects a footpath or highway, you must incorporate a non-electrified gate or stile to cross the fence. • Never install connecting leads (underground cable) in the same conduit as mains supply wiring, communication cables, or data cables.
•Avoid running electric fences parallel with overhead power or communication lines, as it may induce a dangerously high voltage on the fence line. When crossing under power lines do so at right angles and make sure the fence height doesn’t exceed 2 metres.
• Install a mains fence energiser under cover, near a mains supply. Make sure it is out of reach of children, and away from flammable materials.
-

WATER FOCUS – AFFINITY WATER

Soil and Water
Our population is growing and so is the demand for food, highlighting the importance of farming to us all. This growing population will also need more water, especially in the south-east of England. The company I work for, Affinity Water, supplies water in an area already under ‘serious water-stress’ so it is vital that we manage our water resources, from source to tap, in the most sustainable way possible.
The obvious, but often overlooked, fact about drinking water in the UK is that every drop has been sourced from the natural environment in which we all live. We must abstract water from an environment that is also being used for food production, industry and human habitation. In the UK, agriculture is the dominant land use in many of the catchments used for public water supply. Whether you farm on the banks of the Thames or the tops of the Downs; every piece of land, every farm in this country sits within a water catchment. Therefore, what happens on farm and in the field is of interest to us in the water industry and we want to help farmers make positive choices for their farm business and the water environment.

As a reader of Direct Driller you are clearly interested in soil health and value your most important asset, the soil. Improving soil health, although difficult to measure in metric terms, is something you are working towards and see value in. What impresses me about no-till farmers is not only the desire to improve soil health but also the innovative ways many of you are farming. Innovation such as reducing inputs, trialling companion cropping and introducing novel crops into your rotations are a few examples. Many of these innovations will contribute towards a sustainable, resilient farm business but can also help the water environment by reducing soil run-off and losses of inputs to water such as pesticides and nutrients. More research is needed to quantify these benefits to the water environment at a farm and catchment scale, particularly in a UK context, but the perceived wisdom is that healthy soil will lead to healthy water.

Affinity Water, like many other water companies in the UK, have a catchment management team who are working with farmers and other land managers to solve water quality challenges at source. I am sure you have heard of (or are even part of) one of the many water company metaldehyde schemes across the country. Working on metaldehyde reduction in catchments has been an important learning curve for us and has helped us get to know many farmers across our patch and find workable solutions to this problem. Another important aspect of our work is investigating what methods can be used on farm to reduce nitrate leaching to water. We have been investigating the effectiveness of cover crops at reducing nitrate leaching in our drinking water catchments. Cover crops are well known for capturing excess nitrate in the soil but also have many other benefits to the soil and the wider environment. The trial, now into its third year, has tested different cover crop mixes to assess not only the benefits to the soil but also how much nitrate is captured by the cover Crop.
The results are promising and has confirmed to us that cover crops are effective at capturing nitrate. So convinced are we by the benefits of cover cropping that we are planning to incentivise farmers to grow cover crops in areas where we have a nitrate leaching problem.
The soil is the interface between the rain that falls from the sky and the rivers and groundwaters that rely on rainfall for their function. As an industry we are completely reliant on rainfall. We can’t affect how much water falls from the sky but the next best thing we can influence is the soil that covers our catchments. It is generally acknowledged that notill soils have better water infiltration than a tilled soil so one would assume that if a greater area of arable land in our catchments was under no-till then we have greater potential for water recharge into our aquifers. This hypothesis needs to be tested and we are planning to research this topic over the coming years. I hope to continue to contribute articles to Direct Driller and will keep you informed of any developments in our research into soil health and the water environment. If you have any questions or ideas for our catchment management work I’d be happy to hear from you. E-mail: shaun.dowman@ affinitywater.co.uk.
-

WATER FOCUS – THAMES WATER
Creating a Smarter Water Catchment in the Evenlode – Thames Water No Till & Cover Crop trial

Thames Water has recently started a No Till and Cover Crop trial in the Evenlode river catchment as part of its ‘Smarter Water Catchments’ initiative. The company’s work, alongside colleagues from Atkins and Natural England, is helping to encourage water sensitive farming across the Evenlode catchment and to reduce run-off of phosphorus from farms and fields into local watercourses. The project has a number of components in addition to the No Till trial, including an agri-environment grant scheme and advice service.
The River Evenlode catchment lies to the west of Oxford and is in the Thames river basin, partly within the Cotswolds AONB, with the river flowing from Moreton-in-Marsh to Eynsham over a distance of more than 75km. Thames Water is particularly interested in exploring whether a ‘no till’ approach reduces the loss of soil and, in particular, phosphorus, to watercourses, while improving soil health. The company is also interested in whether the approach can increase farm profitability and efficiency.
The trial started in September 2018 and is designed to run for five years, with research support from Innovative Farmers. The trial is farmer-led, allowing participants to test additional topics such as soil health, nutrient application and cost vs yield. Thames Water is supporting its trial farmers in exploring the challenges and benefits of the no till and cover crop approach by offering funding for machinery costs and cover crop seed provision for the no till fields. The aim of this is to remove some of the risk involved in trialling the approach. Field scale soil and water quality monitoring has commenced and will continue throughout the trial. The company looks forward to reporting on some of the initial results from this project in future publications. If the trial is successful, Thames Water will be looking to work with other farmers and land managers to promote this approach in other parts of the Thames River Basin.
For more information, please contact the Evenlode project team from Atkins and Natural England. Jay Neale, Atkins (jay.neale@atkinsglobal.com) or Sarah Olney, Natural England (sarah.olney@ naturalengland.org.uk)

-
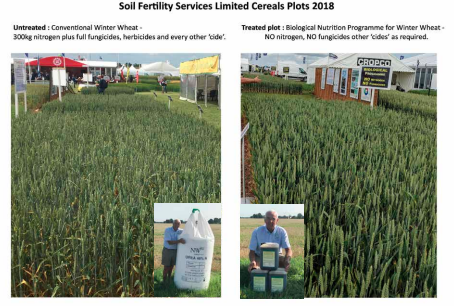
Soil Fertility Services
It was in 2002 that I first wrote an article outlining: ‘The need for’ and ‘Benefit of having’ a good population of mycorrhizal fungi in your soil. That is of course still true but it is not the most important of the life in your soil; so what is?

Of course there may not be any one type of life that is most important, but you will be well aware there are many that can be important but for the wrong reasons. For example soil microorganisms that are pathogenic to the crop you want to grow – you could argue these are the most important because of the damage they can do e.g. Take-all, Fusarium, Clubroot, Rhizoctonia, Scab, Cavity spot, Rust, Eye spot and others all determined to eat or damage your crop and that is without mentioning the insects that munch on the leaves.
What if we stay with the beneficials e.g. earthworms; there are three main species of these and they should be counted as V.I.M. (very important members), but it is none of these; in regular arable cropping it is the beneficial micro-organisms that will live in, on and around your plant; protecting it from the pathogens, feeding it from the soil reserves and from the atmosphere, providing such things as nitrogen, phosphate and trace elements. If you create the correct conditions, the mycorrhizae will inhabit your soil, creating a ‘cobweb effect’ across the whole area and provide some minerals to your crop. They will not protect it from the soil dwelling pathogens.
Beneficial micro-organisms are everywhere, and they are needed by all living organisms on earth. They live symbiotically with plants, animals, and us. If not for these little factories, we would not be able to digest our food and get the vast range of nutrients we require daily. They also defend their host by producing certain antibiotics or simply blocking pathogens away from infection. It is a cornerstone of a healthy immune system. The same goes for the plants; the topsoil is the digestive tract which will provide roots with nutrients that the plant requires, at the time it needs it.
Some of the micro-organisms will protect the host in exchange for sugary exudates from roots, so it acts as the immune system of the plant. To make sure soil is functioning properly, ensuring favourable soil conditions are a must. Additionally, it won’t be any good if we don’t have adequate numbers of these beneficial micro-organisms that will carry out these specific functions, so inoculating soil at key stages will ensure that the plant gets maximum benefit. The soil is a living breathing organism and as such, just like any other living creature, it needs air, water and food in that order. However, there are also plenty of anaerobic micro-organisms that are, for the most part, pathogenic and not what you want to encourage. The most important microbes in any living thing, including you and me, are the ones you can’t see but you can smell them. When your soil smells sweet, that is the geosmin wafting their aroma and is an indication of a healthy soil.
This life in your soil is a constant battle ground, as one army becomes dominant this is then attacked by another and depending on the host plant, may be defeated. If the winner is a pathogen, then your crop will suffer, so now it becomes obvious we need to invest in the beneficials and that means feeding them and adding to their numbers to help them outcompete the pathogens. Bearing in mind it is a constantly changing environment, with plant growth stages affecting the food source for these microbes, which in turn affects the types of these mini bugs, that is why we have now introduced a complete biological programme.
It starts before you plant your next crop, feeding your soil with beneficial microbes in a unique food source. This will allow the beneficial microbes to inhabit the rhizosphere, providing nutrition to your plants with specialist root development enzymes. The inclusion of a range of ‘phosphobactors’ means your plants get their phosphate requirement from your own ‘locked up’ phosphate reserves. A pre-drilling application of Bio-Start is also preparing your soil for the nitrogen-fixing bacteria in the spring. It is all about priming your soil’s ‘microbial army’ for the spring growth surge. In spring we will once again feed your soil’s ‘army’ and will include a range of nitrogen-fixing organisms. Depending on the type of and the health of the crop being grown, further applications may be necessary; the important point is to maintain the advantage gained in this soil war. By now the plant is pretty much in charge of what is going on, unless you compromise your soil army with applications of ‘cides’. If you do need to apply pesticides, then help your soil army recover with a biological activator.
What is amazing is the speed this all happens; for example, if you apply these nitrogen-fixers to the leaf of your plant, within milliseconds these microbes will be translocated to your plant root system. R e m e m b e r the principle is ‘feed your soil and your soil will feed your plant, feed your plant and your plant will feed your soil’. There is a t e m p t a t i o n to apply a carbon source in the shape of molasses to feed the soil but this is not a selective food source and you can cause yourself a lot of problems if you end up feeding the wrong bugs. Better to supply the reinforcements in the shape of megabacters and feed them. Nitrogen fixers, phosphate fixers, plant protectants, root growth stimulants, this is your army. Look after it and it will help you to grow high yields of healthy crops; abuse it and there will be consequences to pay.
-
PLOWMAN’S FOLLY
By Edward H. Faulkner With a Foreword byS. Graham Brade-Birks M.Sc. (Manc.), D.Sc. (Lond.), of the SouthEastern Agricultural College (University of London), Wye, Kent
First published 1945Traditions of the Plough
Continued from Issue 1 of Direct Driller
Ploughing done when the furrow slice is plastic creates clods; every clod is so much soil mustered out of service for the season. The tremendous pressure necessary to separate the furrow slice from its base compresses effectively any soil that is moist enough to be plastic; and a moderate amount of clay in plastic soil serves to harden the mass upon drying so that adobe-like clods result. Smoothing implements may reduce the size of these lumps, but as clods they are likely to remain aloof from the rest of the soil throughout most of the growing season.

Such evidence of damage done by the mouldboard has passed unnoticed by farmers as well as by most other people. Several reasons may be given to account for the public’s blindness to obvious faults of the mouldboard plough.
To begin with, conditions such as modern farmers face were remote indeed when the plough was first used with a crude mouldboard attachment. The land that had been cleared of trees still was not very well subdued, for it was a hopeless task to try to keep the soil free from competing weeds and shrubs while a crop was growing. The forest was forever trying to recover the lost ground, and the only really effective tools farmers had against encroaching saplings, perennial weeds, and other unwanted growth were crude hoes, mattocks, and spades. Such ploughs as they had threw the soil both to the right and to the left.They did not cover rubbish very well, much less uproot permanently the wild growth which cumbered the ground. To-day the “bull tongue” plough of the South of the United States of America is of somewhat the same design as most of the ploughs which preceded the mouldboard.
Into such an environment the mouldboard was introduced. It was a godsend. Pulled by an ox, or even by men, this plough would actually lift and invert the soil. This made it possible, by careful work, to eliminate completely the perennial weeds and some of the smaller shrubs. And, what was more important, the farmer who previously could manage only a few square rods now could raise food on an acre or more. Such an invention at a time when England was never far from actual starvation captured the imagination of rural people everywhere.
It was electric in its effects upon contemporary thought. The population now could eat regularly and well, provided enough farmers could have mouldboard ploughs. Inventions did not occur often in those far-off days. New aids to living were rare indeed. The mouldboard plough, destined to revolutionize the living conditions of world populations, marked the beginning of a new era. So completely did it fill the greatest material need of a poorly nourished mankind that it was accorded a place in people’s thoughts such as is usually reserved only for saints and priests. The plough had saved humanity almost literally.
When we come to the eighteenth century we find that in England and America alike, the farmer had more trouble keeping unwanted things from growing than in getting his crops to grow. For him, then, the use of the plough was excellent strategy, because temporarily, at least, conditions were created which made it impossible for the weeds to grow. This gave the farmer time to get his root and grain crops started before the wild vegetation recovered from the setback caused by the ploughing. Once his crops were well started, the incomparable richness of the soil kept them well ahead of the weeds.
Now that the richness has completely disappeared from most land in the United States, our proper strategy may well be the exact opposite of what was advantageous then. His ploughing, even though it covered a lot of organic matter, could not create for him the sandwich, organic matter profile (OMP), for there was too much depth of blackness in the soil. The crude mouldboards of the eighteenth century could not be favourably compared with the burnished products of today’s factories. Hammered out by hand at forges erected at or near the ore mines, they could become smooth only through much use.
They were designed by guess after many trials and did not become stabilized to dependable shape until a century after farmers began to use them generally. Despite its shortcomings – much easier to appraise from our perspective than from that of the contemporary farmer — the plough was, even in its crude state, the greatest invention of the age. It dispelled hunger as the first oil lamp dispelled darkness. Aladdin’s lamp could not have been more wonderful. When in the middle of the nineteenth century the first experiment station was established at Rothamsted, England, no one seems to have raised a question whether the neat work done by the mouldboard plough might be responsible for the trouble farmers were beginning to have growing crops.
The men of science who manned that first station, as well as those in charge of the state experiment stations later established in the United States, inherited an unquestioning reverence for the plough. The doctrine of the Divine Right of Ploughs passed down from generation to generation, so that the possibility that the plough might account for the waning fertility of the soil never seriously occurred to anybody along the line.
For decades, to my own personal knowledge, men have sensed that the ploughing in of a layer of organic matter at the ploughsole must of necessity interfere with capillary movement; but the subconscious feeling that The Plough Can Do No Wrong apparently prevented anybody from doing anything about it. The result is that, although we have had experiment stations in America for more than three-quarters of a century, no one of them conducted tests, before 1937, designed to compare directly the effects of ploughing, on the one hand, with the surface incorporation of all organic matter on the other.
opening of the present century, it is difficult to avoid assessing blame, on the score of carelessness, against those who did not look beyond their immediate data to the established data gained from ploughing. This is almost implicit in the following:
The Yearbook of the United States Department of Agriculture for 1903 carries this statement on page 284: “Decayed organic matter, by itself or in combination with mineral soil, absorbs moisture much more rapidly than soil containing little or no organic matter; hence, the greater the amount of leaf mould and other litter, the more rapidly will the rain be absorbed. Rapidity of absorption is also influenced by the degree of looseness of the mineral soil. In the forest the mulch of leaves and litter keeps the mineral soil loose and in the best condition for rapid absorption.”
If such a statement seems sufficiently old for its validity to be questioned, compare it with the following, taken from pages 609-10 of the Yearbook of the same department for the year 1938: “Forest litter — the carpet of dead leaves, twigs, limbs, and logs on the forest floor — serves in several ways. Water falling as rain on bare soil dislodges silt and clay particles by its impact. These are taken into suspension and carried into the tiny pores and channels between the soil particles as the water makes its way downward. Very shortly the filtering action of the soil causes the openings to be clogged by the particles; water can no longer move downward through the soil, so it flows over the surface carrying with it the dislodged silt and clay; and erosion is actively under way. A protective layer of litter prevents this chain of events by absorbing the impact of the falling drops of water. After the litter becomes soaked, excess water trickles gently into the soil surface, no soil particles are dislodged, the water remains clear, pores and channels remain open, and surface flow is eliminated except in periods of protracted heavy rains.”
I can detect no significant difference in the meaning of the two quotations. The latter gives a more intimate picture of the processes involved, but it fully confirms the less graphic description in the earlier statement. Moreover, every intelligently conducted experiment so far undertaken in this direction confirms the truth presented.
A paragraph from a letter dated February, 1940, should be interesting in this connection: “The Department of Agriculture has long been interested in developing new methods of soil treatment which will maintain and build up the organic matter content of the soil. Studies carried out by the Soil Conservation Service at a number of locations have already produced unusually outstanding results along this line. At Statesville, North Carolina, for example, it has been found that several inches of pine needles spread over the soil surface reduced the loss of soil by erosion to a point almost beyond measurement. There was also a considerable increase in the organic matter content of the soil and indications point to a worthwhile increase in crop yields. In Nebraska subsurface tillage, which leaves straw and other litter undisturbed on the soil surface, has proved remarkably effective in reducing soil and water losses and in preliminary experiments has led to a material increase in the yield of several crops tested.” This was signed by the Assistant to the Secretary of the United States Department of Agriculture. It may be said that my letter, to which this was the reply, had mentioned and asked for comment on the fact that the mouldboard plough had never been put to test for validation. No mention of the matter was made in the official reply.Failure to do this has definitely handicapped the development of basic soil information which might easily have prevented the debacle toward which American soils have been drifting.
The failure to harmonize the implications of ordinary observations with really scientific information may be the result of historical lag, or an attitude of mind, or mere carelessness, or, finally, a combination of all three. If we consider the published recognition given to the importance of organic material in the soil surface, especially since the The fact that no advance whatever is apparent, when the statement of 1903 is compared with those of 1938 and 1940, indicates that effort to implement the earlier findings into general farm practice has been neglected. The statements from the yearbooks refer to forest soils, of course; but that fact must not obscure the larger fact that the findings discussed concern principles of universal application. Principles which are valid in the forest are valid in the field, always; so it seems that researches into the importance of organic matter on the surface of crop land should have been started as soon as the earlier announcement had been made. If any such work was begun earlier than 1937, I have been unable to find any record of it. -

Drill Manufacturers In Focus…
A LIVING SOIL – THE KEY TO A SUSTAINABLE FUTUREMANAGEMENT

Simtech Aitchison has become a major player on the UK direct-drilling scene in recent years, producing a variety of machines all based on the Inverted T-Slot principle. They cover the broadest range of direct-drills on the market, encompassing arable, mixed, upland and lowland pasture and forage crops, to narrow drills for sowing cover crops in vineyards, walnut groves and orchards.
Simtech’s direct sales policy means that they are in constant contact with progressive and innovative farmers and producers, focussed on improving and experimenting with their cropestablishment and production methods. This gives the sales team a rich and varied insight into how sustainable agricultural systems are evolving into the future, which they in turn use to help customers get the best out of their purchase. “No-Till is not an adequate term for what we are looking to achieve” says Simtech’s Simon Clarke.
“Conservation Agriculture embraces the broader concept much better. Direct-drilling is a vital part of this equation, but needs to be allied with a diverse rotation, good residue management and optimum cover crop usage, to reach its full potential.” “It’s important to think of the soil as a living system and not a growing medium. Given the right tools, a living soil is capable of looking after itself and providing most, if not all, of the nutrients a crop needs. Cultivation disrupts the soil’s biology as well as its structure – tillage is detrimental to worm, mycorrhizal fungi and predator beetle activity, to name just three.”
“Cover crops do just what they say, along with the crop residue they cover the soil to protect it, feed worms and suppress weeds. A living soil can also hold onto much more water, therefore keeping crops growing for longer in times of drought. But of all the elements to building a healthier soil it is the Mycorrhizal Fungi that is the key. Hidden from view it is the web that drives all soil biology and responsible for making available nutrients that were previously unavailable to plants, producing proteins that are essential building healthy soil and protecting plants against pests and diseases.” Simon Clarke continues, “So the benefits are real and the savings on inputs can be massive. As we are presently moving into uncertain times and the near certain loss of main stream subsidies, adopting a more sustainable approach could mean the difference between profit and loss. Around the world, early adopters of Conservation Agriculture have seen their productivity and profitability soar, so this is a real thing and not a theory. It takes effort and commitment, but nothing is easy.”
Simtech continue to develop their machines to work in the environments seen in Conservation Agriculture, from drilling cover crops into often hard dry conditions directly after harvesting, late autumn drilling, when the soil can be quite wet, through to the spring drilling of cash crops into those same cover crops. With new trailed models planned for 2019 they are looking to offer the larger farmers the same capabilities that their core smaller and medium size customers have enjoyed for many years. Simtech have also been designing in extra versatility with a range of systems to allow one, two or even three extra products to be accurately applied at the same time as drilling.
Drills are available with one or two Stocks Rotor Meters for slug pellets and low dose fertiliser, which can both be metered into the airflow with the seed. A Stocks Turbo Jet can also be specified for slug pellets, fertiliser or seed for companion cropping in Oil Seed Rape. Simon Clarke says, “In 2018 we also developed a new model of our popular 300 and 300A Box Hopper drills. Called the T-Sem 300 Micro it has an additional 150 litre capacity “Micro Hopper”, which uses the same sponge feed metering as the main hopper and is capable of introducing slug pellets, seed or micro fertiliser into the seed slot. This makes for a very low cost, but incredibly versatile drill for smaller farmers or someone just starting out with direct drilling.” Liquid fertiliser is also now available across the range, with front mounted tanks up to 1800 litres and a choice of control systems including ISOBUS compatibility. To sum up Simon says, “Our whole philosophy is versatility combined with simplicity. We feel farmers need a crop establishment system that puts as few constraints on them as possible and many of our customers report that owning a T-Sem opens up new possibilities they had previously not thought possible.”
-

Farmer Focus Clive Bailye

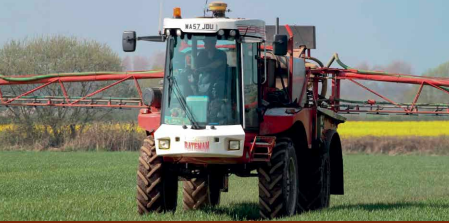
18 years ago, we bought our first self-propelled sprayer and it revolutionized access to land, it was light and well balanced and made fertilizer and crop protection applications easy. Our timeliness and the ruts we used to leave in tramlines all but disappeared.
Back then If you had told me I would ever consider running a trailed sprayer on my farm again I would have thought you were mad. I was once told the difference between a good farmer and a bad one was “a week” so I have always placed ability to travel and make timely application of inputs highly on my list of farming priorities. So why today do I find myself the proud owner of a new trailed sprayer? Both bigger and heavier than any sprayer we have ever run before, and why am I more confident than ever of timely application with this heavy weight monster? What changed? Soil is what changed, and nothing is more demonstrative of that than this increased ability to carry traffic.
The improved structure that has resulted from zerotill can be seen through infiltration tests proving how its structure today can far better cope with rainfall events. Like many other UK farmers most of the land we farm has a now ageing drainage system under it, these systems were put in when grant money for such infrastructure investment was available. Tighter economics means many such systems are now getting tired and becoming less effective and in need of investment which for many is simply just not available. Drainage is essential to consistently successful zero till but doing so with a digger and pipes is a very long-term investment and certainly not something many tenant farmers would consider on a short-term contract.
Under our previous min-till system ponding was not uncommon and wet spots that could swallow a sprayer lay in wait to catch us out when pushing application windows after significant rainfall. Each year of zerotill these areas seemed to get smaller, the temptation to subsoil them was resisted in favor of a light late spring surface cultivation and cover crop mix established on any such bare patch or sticky headland, nothing repairs structure better than roots and the soil biology that surrounds them and it seems that if you can create a good natural structure it can go some way to making up for the failings of an ageing 1960’s drainage scheme.
Get enough wildlife working through your soils vertically and they create a massive network of small drainage channels that can quickly help move water from the surface down to storage in subsoils or out to existing drains very quickly. Worms do this very effectively and I have seen studies that show the combined area of the galleries they can create in a long term zero till soil can total the equivalent of a 4” drain every square meter of the land, if you try to visualize what that would look like it’s very difficult to imagine water ponding on any surface with a vertical drain every square metre.
Less is more when it comes to creating structure, if you plough 10” then then a heavy load will easily break through that 10” of structureless soil, if you min-till to 6” that will be the depth of your ruts when making applications in less than ideal condition, however if you don’t cultivate at all eventually your natural structure will improve to a point where it can carry much greater loads before failing. Cultivations simply destroy the essential channels and break down aggregated structures created by soil life making it a lot harder for water to flow away from the cultivated zone. This means in high rainfall events the soils soon reach capacity making it impossible to traffic and, in many cases, leads to run off, soil erosion and resulting pollution and sedimentation of our water courses.
Of course, soil doesn’t change overnight, it’s a gradual process so getting to a point where increased structure and infiltration can carry heavy loads needs thought and planning. I’m not a big fan of strict controlled traffic farming systems (CTF). Along with the often-high capital cost of adoption I have always felt it dictates too much, causing compromises with important residue management strategies. Although maybe a necessity in farming systems that depend greatly on very heavy high horse power tractors my view is that it’s surely better to just not use potentially damaging machines when you have viable lighter, lower ground pressure alternatives usually employed in zerotill systems.
A less prescriptive form of CTF has however played a vital part when it comes to the parts of our farming system where weight is unavoidable or ideal conditions not always possible. In our case this has been controlled traffic of application and harvest equipment. Fixing tramlines and boom / header width in multiples of 12m has helped us keep damage from such operations localized and allowed targeting of any remedial work. In the early years of system change such remedial work consisted of just leveling any rutted areas and resisting temptation to work deeply which would simply put any longer-term changes to structure right back to square one. Gradually the ruts got shallower and less frequent the heavily trafficked application tramlines became settled and compacted preventing deeper sinking. Our route onto the land had become more stable whilst the soil around it had become better able to infiltrate and cope with weather significantly increasing our windows of application.
Increased workload over the last decade means today we need more application capacity than ever, our self-propelled machine was ageing and replacement long overdue. The tractors we use today are much smaller than they were and with almost no cultivation to do are covering less hours than they ever did making them the perfect match for a modern self-propelled sprayer. The capital cost of a similar spec self-propelled machine was over double that of an equivalent trailed machine. From a financial point of view the savings from the change are significant and fit in well with the ethos behind our farming system of keeping things as simple, minimal and as few engines (which equals potential repair bills!) on the farm as possible.
It’s not all positive however, tractors don’t have the clearance of a self-propelled machine and changes between row crops and low ground pressure wheel equipment would take longer and be more frequent, trailed machines are not as “handy” in the smaller fields, backing into corners and working around obstacles. These are compromises we considered long and hard before making the decision to change. To mitigate this, we have moved from 24m to 36m tramlines. 36m still fits with the harvest operation where we control the unavoidably heavy machinery and 12m base organic fertilizer and lime applications yet even when running wide tractor tyres all year around the area lost to uncropped tramlines and reduced ground clearance is not much more in percentage terms than that lost to narrow wheels on a 24m system.
Farming systems are often compared primarily on agronomic merit. Often the first thing I am asked about our transition to zerotill is how do the crops yield? or what are gross margins like? Others are interested in the operational cost savings we have made like fuel and wearing metal. Although not insignificant none of these things are where the truly fundamental business changing difference are. Zerotill creates opportunity for complete business restructure, radically different rotations that include higher % of spring cropping may provide lower rotational average gross margins, but they also provide serious scope for cost cutting as well. UK agriculture has been obsessed with gross margin for too long and has lost sight of more fundamentally important profitability.
Chasing the maximum output rainbow has led many of us to unsustainable rotations and the current decline in soil health bringing symptoms like blackgrass, pest, disease or plateauing and even declining yields for some. As my recent change to a trailed sprayer demonstrates, smaller tractors add flexibility in their use and without cultivations to complete along with their drivers have more time available for more varied “allrounder” operations. The restructure here has been gradual, we never had a farm sale or made anyone redundant, we let things evolve and made machinery changes as and when they needed making and, in many cases, simply took on more work without needing to invest in additional infrastructure to complete it.
Today our capital employed per acre is less than half the level it was when we mintilled and a quarter of the level I believe would be required should we return to the plough, depending on circumstance that reduces debt and its cost or provides capital to expand or diversify. The increased diversity and spread of our rotation has reduced average gross margin, spring break crops will never compete with the output of a decent crop of winter OSR but with a lot less bills to pay does that really matter? These fixed costs savings are what makes the difference and will become essential in the potentially un subsidized trading environment we all face in the years ahead The big question is though as small becomes the new big here just how far will things go? Will I look back on this in years to come while my swarms (if that’s the correct collective noun) of robots work the land and laugh at what I once thought was “small”? Will my recent purchase be my last sprayer? There are some exciting times ahead of agriculture, nothing short of an agricultural revolution is on our doorstep and I really can’t wait for the many exciting challenges and changes that will bring.
-

Product In Focus…
BIOFIL – LIQUID ORGANIC SOIL INOCULANT IS NOW AVAILABLE IN THE UK

BioFil is a liquid organic bacterial soil inoculant which has been used by Hungarian farmers for more than 5 years with great results. The products are finally being launched in the UK and will be available from Farm Marketplace from January 2019. Research with pH-specific soil microbes commenced in Hungary more than 12 years ago, when scientists of BioFil Ltd. recognised that there was a need to find a way to grow crops in soils with extreme pH, either acidic or alkaline. They set out to find species of naturally occurring soil microbes that would support plant growth, help to improve soil structure and increase crop yields while at the same time re-duce the application rate of chemical fertilisers. Today BioFil Ltd. has a dedicated team of 25 researchers, three of whom hold PhDs in microbiology, who are continuously seeking to improve the performance of BioFil prod-ucts through careful selection of bacteria and to develop new products and services.
The current range of BioFil has six products: BioFil Acidic (pH 4-6), BioFil Normal (pH 5-7), BioFil Alkaline (pH 7-8), BioFil Pea/Bean, BioFil Soya and BioFil Post Harvest. Each of the products include up to 7 unique bacterial strains specifically developed with your soil pH in mind. BioFil Acidic contains bacterial strains which reproduce well in acid-ic soil pH. While BioFil Normal contains bacteria which prefer soils with neutral pH and have an excellent nitrogen-fixing ability. BioFil Alcaline was developed for alkaline soil and effectively suppresses the reproduction of plant pathogen fungi. BioFil Pea/Bean contains pea-symbiont bacterial strains which increases the formation of nodules and provides plants with nitrogen. Peas and beans become healthier and more developed, more resistant to various diseases. The bacterial inoculant BioFil Soya is re-sponsible for soya nodulation.
It contains a symbiont nitrogen-fixing bacterial strain. BioFil Post Harvest is used for intensive degradation of cellulose and can multiply even in low soil temperatures which makes it very effective in degradation of stems, leaves and roots so that the next plant culture gets access to valuable nutrients. There is no need to apply nitrogen for stalk degradation as this product contains nitrogen-fixing bacterial strain of high capacity.
Field trials conducted in Hungary have been continuously providing highly positive re-sults. In 2018 a green pea trial where acidic soil was treated with BioFil produced a sig-nificant yield increase of +26.7%. Also, yield increase of +40% was reported in 2016, and +50% was reached in 2015. While sunflower trials conducted in 2017 showed yield in-crease of +23.1%, potato trials conducted in 2017 produced +6 tonnes per hectare, and in the last few years soya trials (some of them utilised acidic soil inoculant) showed in-crease of between +9% and +42.9% in crop yield. This year BioFil established their fist trials in the UK with the autumn crops. They used acidic soil inoculant for 5 ha of winter wheat, 3 ha of OSR and 2 ha of beans. Each of the products was used with notillage, either a Cross Slot or a John Deere machine. The crop results will be reported after harvest in the Direct Driller magazine.
While BioFil makes no recommendations with regards to lowering of chemical fertiliser application rates, when the products are applied as directed they have the effect of providing the equivalent to approximately 100 kg/ha of chemical NPK. This is achieved through the inclusion of high concentrations of nitrogen fixing bacteria that solubilise phosphorous and potassium in the soil that cannot otherwise be accessed by plants.
BioFil products are well proven to be reliable and very cost effective over a broad spec-trum of crops and as a generalisation, for monocots yield increases are usually in the range of 5% to 15%, and for dicots 5% to 25% when compared with a control that re-ceives the grower standard chemical fertiliser application. However, with different seasonal growing conditions yield increases vary and being products containing very high concentrations of living soil microorganisms, they need to be handled carefully and applied in the correct manner to achieve the expected results. Because the bacteria can be damaged when exposed to UV radiation, it is essential for the liquid applied to the surface of the soil to be incorporated into the soil to a depth of 5 to 10 cm.
While this is not an issue when applied under no-tillage, under conventional tillage, the BioFil is applied during a tractor pass over the land preparing the seedbed or at the time of seeding, and needs to be raked into the soil. A tank and spray system known as BioFil Jet has been developed, which can be at-tached e.g. to the front of a tractor and applies the liquid at the rate 50 litres/ ha, and in the same pass over the land is incorporated by a rake towed behind the tractor. The products are competitively priced. It is not uncommon for experienced users in Hun-gary to achieve a yield increase and input cost reduction of up to 10 times the cost of the product. BioFil products have a shelf life of 6 months when held under refrigeration at 4 ºC to 5 ºC and up to one month at 20 ºC. Orders placed with Farm Marketplace at least one month in advance of the estimated application date will be guaranteed delivery of product that has been held under refrigeration and has a shelf life of 20 days on the farm at 20 ºC
The products will be available from www.marketplace.farm. For more information about the products go to www.terragro.hu.
-

Why Does Soil Health Matter?
How much do you really know about your soil and its health? Elizabeth Stockdale, NIAB and knowledge exchange lead for the AHDB Soil Biology and Soil Health Partnership takes a closer look.

Recent work on soil management carried out by AHDB with grower groups across the country highlighted a lack of information on soil biology and soil health. Soil physics, chemistry and biology are interlinked and all play a role in maintaining productive agricultural and horticultural systems. While physical and chemical properties of soil are relatively well understood, the same is not necessarily true for soil biology. Soils contains a very high diversity of organisms. Until recently only around one per cent of all soil micro-organisms had been identified. Soil organisms interact with one another and the chemical and physical properties of the soil to drive soil processes, such as:
• Release and recycling of nutrients
• Forming and maintaining soil structure to maintain water and aeration
• Both causing and controlling plant diseases and pests
• Nitrogen fixation or increasing nutrient availability through beneficial relationships with plant roots
Together interactions between soil physical, chemical and biological factors contribute to soil health. In the same way we measure our own health by our ability to carry out our normal everyday tasks, healthy soil can be recognised by its outputs/functions i.e. healthy plants, animals and ultimately humans.
It is useful to consider whether we can identify underlying indicators that help us identify when soil is in a healthy or unhealthy state – the equivalent of taking a soil’s blood pressure and temperature. Because of the wide range of soil types, climates and farming systems in the UK, it is important to put such indicators into context. AHDB’s GREATsoils programme pulls these three factors together and provides valuable information on soil management for growers and agronomists. Funded in 2016, the Soil Biology and Soil Health Partnership aims to fill a gap in knowledge and help farmers and growers manage soil health better.
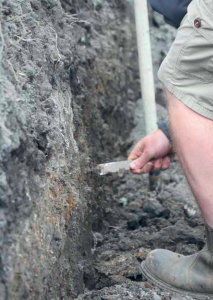
The Soil Biology and Soil Health Partnership, 2017-2021
Funded by AHDB and BBRO, the five-year Soil Biology and Soil Health Partnership is a series of cross-sector research and knowledge exchange projects. Each is designed to help farmers and growers maintain and improve the productivity of UK agricultural and horticultural systems. The key output of the Partnership will be a toolkit including an integrated scorecard to help growers measure and manage soil health. All the outputs will be designed with farmers and growers so they can be easily understood.
The Partnership comprises eight scientific partners and six industry partners and this breadth of expertise provides a robust practical and scientific foundation. However, we recognise that farmers and growers have already taken the initiative to understand the health of their own soils and a great deal of work is already being done on-farm to experiment with ways to optimise soil biology and health.
Therefore, from its outset the Partnership has sought to work closely with farmers, growers and advisers to draw together and build on current knowledge and experience. Crucially, the Partnership will also involve key players in the agri-food sectors to direct the work and maximise the practical relevance of its findings in modern farming rotations.
Findings so far
In the first year of the programme, we have:
• Updated scientific reviews of soil biology and soil health
• Developed a model that provides an easily understood summary of the effects of soil management on soil biology and soil health
• Identified a set of methods to measure soil health on-farm which can be used to support practical decision-making
• Reviewed molecular-based
approaches that can be applied to assess soil biological function In recent years, a range of indicators for soil biology have been developed. It is now possible to measure soil chemical, physical and biological properties. Some of the best measures of soil physical structure and its stability can be completed in the field whereas most chemical properties need samples to be sent away for analysis. The recommended biological indicators may be assessed in the field (earthworms) or sent away for analysis (soil respiration).
However, often these indicators have not been produced in parallel with the necessary guidance and tools to allow them to be easily used on farm. We have selected some indicators for testing where we will focus on whether the target values/thresholds for soils/ farming systems are correct e.g. soil organic matter levels. We are also trying out new DNA-based indicators of the soil biological community in practice.
What next?
Over the next three years, we are working on pre-existing long-term soil management trials and on commercial farms to evaluate the performance of the model and to evaluate a new soil health scorecard. This work includes trials on raspberry, onion and narcissus. Seven long-term soil management trials have been identified which have treatments in place that target the main influences on biological function:
• Food source – nutrient and organic matter inputs, cropping choice and sequence
• Air and water supply – tillage systems and drainage
• Chemical environment – pH
Across these trials and commercial farms, a programme providing detailed monitoring of crop (yield, disease and weed constraints) and rotational soil health is now in place. Soil sampling takes place in the autumn post-harvest and after the soil has wetted up. A key part of sampling for rotational soil health is the linking of measures of soil physical, chemical and biological properties.
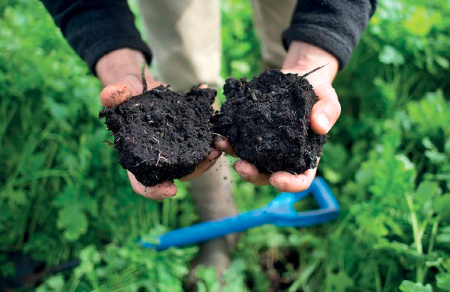
As soils need to be moist, sampling may take place post-cultivation/drilling of winter crops, but leaving a gap of at least one month after soil disturbance. Soil physical properties and numbers of earthworms are recorded in the field at the time of sampling and we are also collecting cores for the measurement of bulk density.
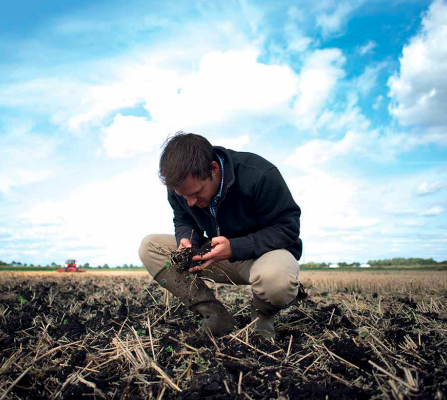
A bulk soil sample is collected to allow extended soil chemical and biological analysis using the NRM Soil Health package plus direct measures of soil organic carbon, total nitrogen, potentially mineralisable nitrogen, microfauna and nematodes. The same soil samples will also be used in the development and validation of DNAbased soil biological indicators. To allow control of the factors under study, many research trials have specific and narrowly focused remits, often with limited acknowledgement of rotational impacts. Consequently, implementation and impact of soil management on farms has been less well studied. The Soil Biology and Soil Health Partnership is deliberately taking another approach and is working with farmer and grower research-innovation groups to evaluate the impacts on soil biology and health across a broad spectrum of crops including field vegetables, climates, soil types and rotations.
For more information on soil biology
and soil health visit:
www.ahdb.org.uk/greatsoils -
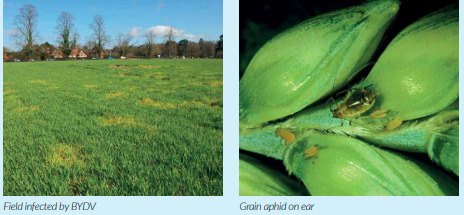
Aphids, BYDV Management And New Research
Virus-spreading aphids and the risk they pose to winter cereal crops are the subjects of a new management tool and a
research project funded by AHDB.Barley/cereal yellow dwarf viruses (BYDV) are mainly transmitted by the bird cherry–oat aphid and the grain aphid – via wingless and winged forms. Wingless aphids, which live on grass or volunteer cereals, can colonise the following cereal crop. This ‘green bridge’ can be managed, to various degrees, through cultivations. Winged aphids migrate to newly emerged crops from grass, volunteer cereals or elsewhere. In most years, this infection route stops in November but it can continue throughout mild winters.
Initially, aphids colonise relatively few crop plants. When the second generation offspring are produced, these tend to move away from the plant originally colonised. Consequently, controlling this generation is a key component of a BYDV management strategy. The timing of the second generation can be approximated by accumulating daily average air temperatures above a baseline temperature of 3ºC. It takes around 170 ‘day degrees’ (DD) for the second generation to be produced. To use a simple scenario, daily average temperatures of 20ºC for ten consecutive days – (20ºC – 3ºC)*10 days – equates to 170DD.

As average daily temperatures decrease throughout autumn into winter, earlier drilled crops usually reach the 170DD threshold quicker.
DD calculations should start either:
• On the day of emergence for untreated crops
• When aphids are present and protection from neonicotinoidtreated* seed has run out (around eight weeks after sowing). *Only available for cereals drilled before 19 December 2018
• Following a pyrethroid application (account for product persistence, see label)
Powered by the AHDB WeatherHub, the BYDV management tool features a UK map of weather stations. People can select their nearest weather station (or stations, by selecting a ‘Region’) and select a start date (using the slider) for DD calculations. Once 170DD has been accumulated, the relevant line on the chart displayed enters the yellow zone. At this stage, crops are estimated to be at risk and treatment should be considered. BYDV risk is highest during the early growth stages and passes at GS31.
Prolonged cold periods can also reduce the risk significantly. The BYDV management tool should be used as part of efforts to minimise insecticide use and to manage resistance threats. Grain aphids with moderate levels of resistance to pyrethroids are already widespread in the UK, although effective control should still be achieved at full label rates. At present, there is no evidence of insecticide resistance in bird cherry–oat aphid.
The BYDV Tool
AHDB have released a BYDV management tool (available at: cereals.ahdb.org.uk/bydv) that can be used to predict when the critical second generation aphid offspring (and subsequent generations) are likely to spread through cereal crops. The tool uses air temperatures, from a network of weather stations, to predict when critical second generation aphid offspring is likely to spread through cereal crops. Farmers and agronomists are being asked to use to the tool to both target sprays this season and consider how management might need to change in 2019 – when early aphid protection from a neonicotinoid seed treatment will no longer be an option.
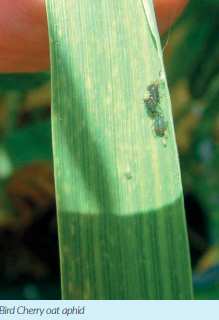
New research on BYDV risk
A new research project has also been funded by AHDB to look in more detail at future management of BYDV. The research, which explores in-field aphid monitoring techniques and control approaches, will deliver results by next autumn – when cereals will be drilled without the protection afforded by a neonicotinoid seed treatment. The Game and Wildlife Conservation Trust (GWCT) has been awarded the contract to lead the work.
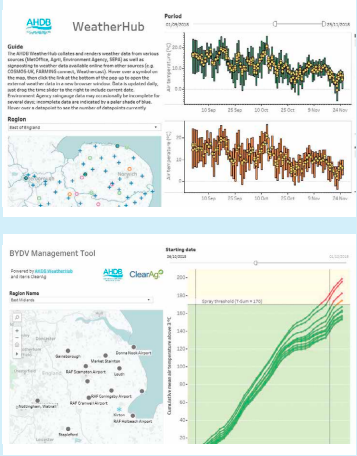
Commercial and research trials will be used to test infield monitoring approaches. The trials include the use of sticky traps designed to catch winged cereal aphids. The researchers will explore trap designs and placement. Critically, the team will establish any relationship between the number of aphids trapped and the number flying. Observations of BYDV levels in trials will be used to identify or confirm risk factors. Many factors will be investigated, including those relating to landscape characteristics, cultivation approaches and the presence of natural enemies.
Farmers and agronomists will be actively involved in the work, including the provision of trial sites and opinion, to ensure project outcomes are relevant to industry. Charlotte Rowley, AHDB Crop Protection Scientist, said: “Full-rate pyrethroid sprays can provide effective control of aphids but they are becoming resistant. At present, this is limited to moderate levels of resistance in grain aphids. Knowledge about BYDV risk needs to be improved, to make sure sprays are only ever used as a last resort.”
For more information on aphids and BYDV visit: cereals.
ahdb.org.uk/aphids -
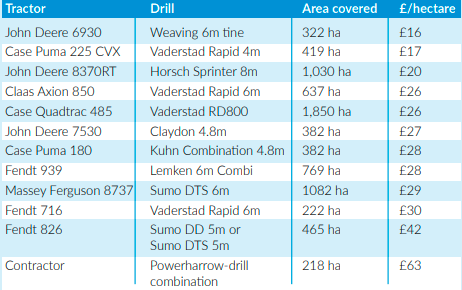
Assessing Machinery Policy Brings Dividends
The AHDB Monitor Farm network have run a Labour & Machinery review on over 20 farms stretching the length and breadth of the UK, here AHDB’s Harry Henderson shines a light on the findings.
Across the AHDB Monitor Farm network, with the help of Strutt & Parker we have run a Labour & Machinery review on over 20 farms stretching from Morayshire in the north of Scotland to Truro some 700 miles to the south. At each Monitor Farm meeting on these farms, we have discussed the Monitor Farmers costs, and given the attendees a way of quickly calculating their own costs, so they can easily see if costs are in the ballpark or heading upwards, with no change in farm output to support the uplift.
It could be easy to assume that there are a set of numbers each farm must get close to, to achieve good business results. We have all heard statements like getting below 1.5HP/ ha, farming more than 300 hectares, employing 1 person per 1000 hectares are benchmarks every farm should work towards. The reality of course, it is not that simple. Each farm business has different objectives and attitude to risk, lifestyle and yes, vanity comes into it too.

There is nothing wrong running the business however you like, so long as the machinery policy is sustainable, affordable and able to weather the unknown years ahead. So understanding your costs is vital and reducing soil movement costs could be seen as low hanging fruit.
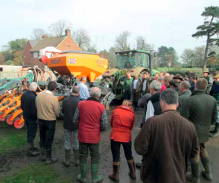
Looking at crop establishment costs in particular, from a full Lemken plough and 6 meter mounted powerharrow drill combination through to a onepass Sumo DD, and most machines in between, where costed out in the same format the costs of drilling one hectare of land ranged from £16 to £63. Of course, in most situations, it’s the work carried out ahead of the drilling operation that matters, how many times have you seen a min-till drill working in a seedbed a Massey 30 drill could cope with? So was it a Massey 30 costing just £16/ha to use, and what is costing £63?
It goes without saying, there is a whole other story behind each of these drill set-ups in terms of pre-cultivations and little can drawn upon these figures alone. Having said that, the farm that runs a strip-till drill and/or a notill drill could be seen as able to draw on technology for any soil condition and still comes in costing below a contracting charge for a powerharrow combination. That makes you think.
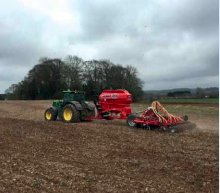
If you were wondering, the Massey Ferguson 30 4meter drill, pulled by a David Brown 1494 Hydrashift covering 55 hectares last year cost just £7/ha to operate, using family labour. The stand out point here is that depreciation is nil. The issue might come when you give this rig 200 hectares to do, running the risk of break downs and missed drilling windows, adding costs in another way.
At the AHDB Monitor Farm meetings, we have been using a simple paper based calculator to give a quick calculation of machine costs. It’s better than a back-of-an-envelope calculation but if you need to consider downtime (rainy days) of farm staff, more accurate fuel calculations and depreciation based on machine replacement value then that falls outside the scope of this calculator. But as a quick guide, it’s good enough.
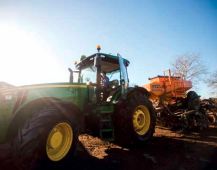
Search ‘AHDB machinery cost calculator’ on-line and it will pop up. Or visit: cereals.ahdb.org.uk/tools/ machinery-cost-calculator.
It is also important to understand that low tractor costs per hour may not be the best target. A John Deere 8530 in Yorkshire pulls a 4m strip-till drill and nothing else. Totalling just 200 to 250 hours a year it would be easy to assume the tractor is underutilised and should be sold with a hire tractor brought in each year. But the total yearly costs of the 8530 are half that of a suitable tractor hired in at peak season. A comfortable, reliable tractor with RTK, the Deere will remain on farm for the foreseeable future.
What are the top tips from this review?
Drawing comparisons across all the Monitor Farms you soon see just how different businesses really are, but here are six
top machinery policy tips from the top 25% of performers;1. Low depreciation costs per hectare. Depreciation is the largest cost in running a machine at 33%, followed by fuel at 26%. There is a positive correlation between depreciation costs and the overall operation costs; all of the top 25% achieved low operational costs with machine depreciation costs below the average of £63 /ha. This was achieved either through simply operating over a large area (those with a low HP/cropped ha). Where this was not possible, low depreciation costs were also achieved either where the machines were kept for longer (beyond 7 years) or residual values kept high through regular maintenance.
2. Low repair costs per hectare. Low repair costs were not exclusive to farms running newer equipment. Farms with older machinery still achieved low repair costs through tactical hiring of key equipment (eg. the combine), or through employing experienced staff who could carry out basic maintenance and repair work on the machines. The adoption of a prolonged replacement policy should be evaluated on a machine-by-machine basis, identifying those which can be easily repaired/serviced and for which reliability is not paramount. 3. Low diesel usage per hectare. As fuel is the second largest cost of running a machine (26%), the top 25% were all using less than 100 litres of gas oil per cropped hectare on average.
4. Low machine costs per hour. The top 25% had hourly machine costs for their main operational tractors (e.g. drilling tractor) ranging from £17 /hr to £24 /hr (for 190-250 HP tractors). The low hourly cost of running a tractor created savings in the key operational costs such as drilling. Whilst low machine costs per hour are linked to depreciation, they were also achieved by farms carrying out contract work, or farms with non-arable enterprises which utilise the annual ownership of the machine.
5. Low cost of combining per hectare. Combining is the most expensive operation applied to a crop at £66/ha on average. The top 25% were generally covering more hectares per metre of combine header than the rest at 70ha on average. A 10m header was therefore cutting at least 700 ha. The cheapest cost of combining (£41/ha) was achieved by a 7.3m combine cutting 569 ha (78 ha per m of cutter bar). This machine was also contract hired, and hence had no repair costs associated with it. The average area cut by an individual combine was 545 ha. Interestingly, the most utilised combine (121 ha per m of cutter bar) still had an above average cost per hectare. This particular machine was hampered by small fields, averaging just 10 hectares each. Some Monitor Farms had a combining cost greater than £87/ha, the same as the average NAAC contractors charge rate. Marginal savings from using a contractor may however be outweighed by logistical and timing inconvenience.
6. Size. Whilst there was no clear correlation between size and costs, the top 25% ranged in size from 500 ha to 1,000 ha in cropped area. Economies of scale prevented some of the smaller farms (under 350 ha) from obtaining the lowest cost wheat production. Conversely, some of the largest farms had the highest costs.
To learn more or join a Monitor Farm meeting, visit: cereals.ahdb.org.uk/monitorfarms
-
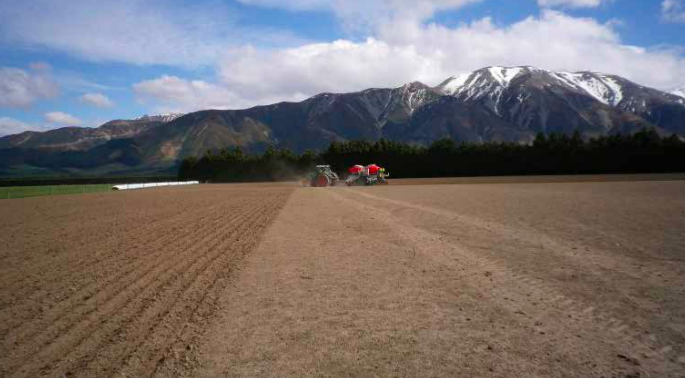
How NZ Contractors No-Till 3000HA/Year With A 3M Seeder
By Thierry Stokkermans
There is one country where some contractors seed 3000 hectares per year with a 3 metre wide drill, and it is New Zealand. It is not a country of wide plains… most paddocks have odd shapes. How do they do this?

New Zealand has a mild oceanic climate and numerous mountains. Their climate allows the grass to grow all year long. They stock sheep and cattle, for the meat and the milk. There is some cash cropping but arable farms are uncommon, most farms are all grass or mixed. In this pedo-climatic environment and with this farming industry, it is possible to establish new crops 10 months a year. The limitation is a winter break of about 2 months. The NZ seeding calendar is the following:
• Towards the end of winter, farmers will seed spring barley, spring peas and some pastoral mixes such as plantain-clover.
• During the spring, they seed grassing crops to get through the following winter such fodder beet, kale and turnip. This is followed by corn seeding.
• Through the spring, temperatures are getting warmer and seeding get higher and enters mountainous areas.
• Early summer, the high pastures (up to 1000 metres) are reseeded with pluriannual plants such as clover and ryegrass.
• During summer, the seeders will follow the combine harvesters to seed fodder crops in the stubbles and produce a maximal amount of feed for the winter.
• Towards the end of the summer, Oil Seed Rape (OSR) might be seeded but it is a marginal crop in this country and many farmers will reseed older pastures to gain productivity and maximise fodder production the following years.
• Finally, during the autumn, cereals crop will be established and the last fodder crops will be seeded in newly available land such as corn stubbles for example.
Due to its mild climate, its crop diversity and the landscape, crop establishment jobs are spread over the year and a large number of contractors offers custom-seeding to their customers. Some contractors seed a few hundred hectares with a single machine, other seeds more than a thousand hectares and several seed 3000 hectares with a single 3 meters wide rigid drill. A 3m machine travelling at 12- 13km/h can easily cover 3 hectares per hour. But when the field has an odd shape or the slope is so steep that it is only possible to seed it downhill, the productivity drops quickly. And after adding the road time, the maintenance and talking time with the customer, the tractor will operate about 1500 hours a year in front of the seeder, keeping one man busy all year round.
Many contractors seeding more than 2000ha per machine per year focus on two elements: agronomic support and quality of seeding. The contractor frequently visits their fields when plants are emerging – it is an agronomic and customer relationship task they commit to. This has several positive points: observing successes and problems; sharpening agronomical knowledge; improving the quality of their work; and getting to know the customer and gain their confidence. After a while, the farmer sees its contractor as an expert and a consultant in seeding and, in this livestock farming country, they can give them the role of decision maker for crop establishment.
Those contractors work under no-tillage regime and operate Cross Slot seeders. In New Zealand, some farmers plow, other do alternative tillage (e.g. min-till) and a number goes no-till. Looking at the machinery, the market offers the same seeders as in Europe such as John Deere, Great Plains or Aitchison (the last one is a kiwi manufacturer). Some contractors propose a complete tillage process, some offer no-till with a John Deere or an Aitchison. But the only one who managed to use their seeder 1000 hours per year and more are short frame Cross Slot seeder owners.
The main reason is the Cross Slot capacity to pass all year round in all terrains and, therefore, to allow a high fodder and dry matter productivity. The pro of a short frame on a Cross Slot is that the two seeding beams are close together which make it easier to seed travelling sideways on a slope. Indeed, when seeding across a slope, the tractormachine combination tends to walk sideways (a bit like a crab), therefore a shorter machine often keeps working for longer and keeps providing good performances.
As a comparison, a contractor from the Waikato region owning a 6 meters wide John Deere 750A only uses its seeder on smooth fields in the autumn. The shorter vertical travel of the opener does not allow him to seed in older pastures which have bumps and holes. And the quality of the seed environment only allows for autumn seeding. Indeed, in New Zealand like in France, the autumn crop establishments are the easiest to succeed in no-tillage. In New Zealand like in Europe, the Cross Slot opener is heavy to pull.
Furthermore, to pull the machine on a mountain slope, it is important to upsize the tractor and the power. Kiwis mostly use 6 inches row spacing (or 150 mm). A 3 meters wide seeder has 20 openers. On a sandy plain, this will take a 120hp. Working heavy clay on the level it will take up to 200 hp. But New Zealand is a mountainous country and the tractor for such seeder is about 280hp. To provide good traction, the tractor has a decent set of tyres and is ballasted up to 45- 50 kg/hp. This adds up to a tractor weighing 14 tonnes – a weight that could give goose bumps but less scary than some of the fields where seeding is only possible travelling downhill.
The invoicing of a Cross Slot seeding operation is about 200 New Zealand dollars ($NZ) per hectare. It varies from 180 up to 220 $NZ depending on the area and the contractor. And for the jobs with extremely low productivity, such as tiny field and downhill only seeding, some contractors invoice the worked time (hours) instead of the area (hectare). Seeding operations with an Aitchison or a John Deere are half price. It shows that the difference in cost for the client is justified by the versatility, the seeding quality, the productivity gain and the agronomic support.
Looking at the financial investment, a brand-new tractor + seeder combination with 3m working width cost about 600 000 $NZ. The seeder costs as much as the tractor (or the opposite). To quickly find the efficiency of an investment, kiwi contractors apply the rule of the third: to be profitable, the yearly invoicing has to be at least a third of the investment. For the above investment, contractors will have to invoice at least 200 000 $NZ/year which is about 1000ha/year.
For those contractors, the clients have different profiles and have different strategies. Some are engaged in Conservation Agriculture and want to improve their soil. Other wants to maximise short term profitability and get the pastures grazed until the roots (see picture). As any service business: taking the job means bring satisfaction to the customer. Those contractors understand this to the full extent and they are working for and with their customers. To maximise the return on their tractor-seeder combination investment, they are available and mobile. Working on Sundays is common practice. Most of their customers are within half an hour driving from the contractor shed but, sometimes, 2 hours of driving are required to visit a remote customer.
For reference: the current exchange rate is 1.93 NZ$ to 1 GBP£.
You can read Thierry’s blog online at: https://thierrystokkermans.wordpress.com/
-
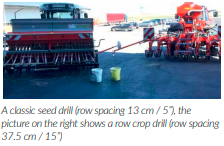
Comparison Of “Standard Row” To “Wide Row“ In Organic Spring Wheat And Soybeans
By Einböck, from their Organic Farming Guidebook
In spring of 2017, organic spring wheat and soybeans were sown in plots (4000 m² each). Each crop was seeded once in standard row (row spacing 13 cm / 5”) and on wide row (row spacing 37.5 cm / 15”).
Location
The test area is located at 4751 Dorf an der Pram (Austria), at an altitude of 460m above sea level. The average annual temperature is 11 degrees Celsius and the average annual rainfall is 900 litres/m² (distributed over 80 days of rain). The soil type is silty loam.
Seeding

At spring wheat, the sowing rate was reduced by 28 % compared to standard row. (345 grains/m² instead of 480 grains/m²) In the case of soybean, 70 grains/m² were sown on both plots.
Basis for calculation:
• Machine costs without driver (OEKL-values 2017)
• Costs for soil preparation, seedbed preparation, sowing and harvesting were not included, because they were identical in both systems
Mechanical weed control:
(Regarding the weather conditions, the optimal times for weed control of the respective crops wasn´t possible)
• Spring wheat standard row
• Tine weeding: start of tillering
• Tine weeding: middle of tillering
• Spring wheat “wide row”
• Hoeing: start of tillering
• Hoeing: middle till end of tillering
• Tine weeding: end of tillering
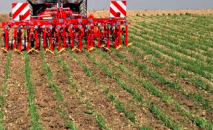
Soybean standard row:
• Blind-weeding: 4 days after seeding
• Tine weeding: 2nd seed leaf was visible
• Tine weeding: the plant was 10 cm / 4“ high
Soybean “wide row“:
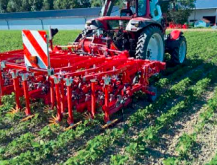
• Blind-weeding: 4 days after seeding
• Hoeing: 2nd seed leaf was visible
• Tine weeding: the plant was 10 cm / 4“ high
• Hoeing: shortly before blooming
Result spring wheat:
In addition to the 5.7 % increase in yield, a 0.58 % increase at the protein content was observed. The increased protein content leading to a higher profit.
- Revenue: for standard row (protein > 13 % protein 415.38 €, according to Agrar Markt Austria for 2016/17 without tax) *
- Revenue: for Wide Row (protein > 14 % protein: 442.40 €, according to Agrar Markt Austria for 2016/17 without tax)
Despite the increased cost for weed control, a 10.2 % surplus of profit was possible, because of the reduced seed costs and the higher price for the higher protein content of the spring wheat in the “wide row”.
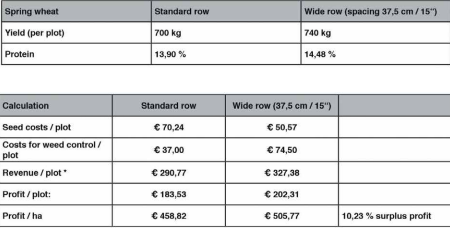
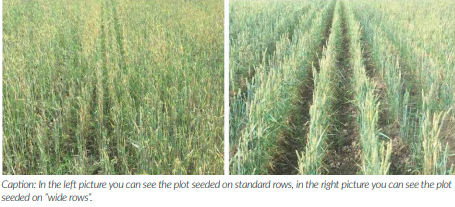
Result soybeans:
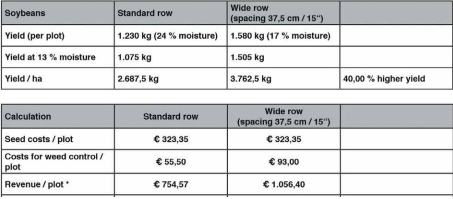
By breaking the soil crust with the hoe, the gas exchange and the activity of the nodule bacteria was increased. This is the reason, why the soybeans achieve a 40 % higher yield in the wide row than in standard row.
* Revenue: Price for organic soybeans for food industry 2016/17 according to Agrar Markt Austria 701.93 €/t without tax
Despite the increased cost for weed control, a significant increase in profit of 70.4 % was achieved
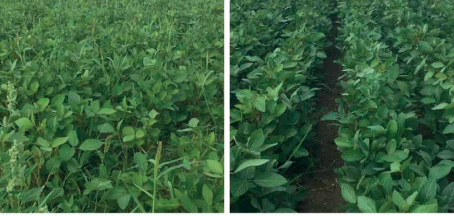
In the left picture you can see the plot seeded on standard rows, in the right picture you can see the plot seeded on “wide rows“
-

A Guide To On Farm Trials From ADAS
GPS and other modern technologies, along with thorough trial protocols, can make farm trialling straightforward and routine. Decisions and innovations can then become thoroughly validated and tailored to real farming conditions.

This useful guide from ADAS outlines processes leading to successful farm-trialling and how to avoid the pitfalls. The guide covers trials conducted with ADAS Agronōmics support, trials using yield mapping technology without ADAS support, and trials where the yields are assessed by weighbridge.
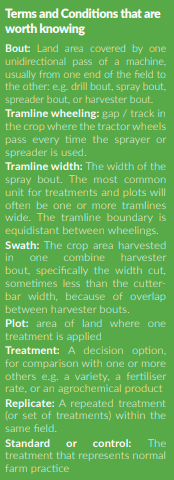
Firstly – What Question are you asking?
• What decision do you want to test? E.g. rotations, cultivations, varieties, fertiliser rates, new products, application timings? Does the importance of this decision merit the effort invested in a trial?
• Most questions have been asked and many answered already. Check with an expert (or search the internet) to see what research has already been done.
• Share your plans: several farms doing the same trial and getting the same results will make the conclusions much more trustworthy and valuable. • Define the control or ‘standard’ practice with which you want your new idea to be compared.
• For any question posed, you need an answer that you can use in future. So ensure that the results will be relevant to your farm and unaffected by expected future changes on farm.
• Average farm trials can ‘prove’ grain yield differences of 0.3-0.5 t/ha. Only the very best farm trials can ‘prove’ differences as small as 0.1 t/ha. Think about what difference you expect and what imprecision you can tolerate.
Secondly – Is your Farm set up for a Trial
Fields
• Do you have fields with the right crop which are big enough, square enough and even enough?
Equipment
• How easily can you apply the different treatments that you want to test?
• How will yields be measured: using yield mapping or a weighbridge? This will affect trial design and management.
• If using yield mapping, do you know how to retrieve and process the data?
• Can you geo-locate tramlines, treatments and yields accurately? Mobile phone precision is crude (>5m). RTK gives the best GPS accuracy (<1m).
• Can you acquire other useful measures? E.g. soil maps, crop sensing, satellite imagery, or drone photos.
Attitude
• Will you be willing to put up with extra hassle at harvest?!
• If using a contractor, are they fully on board?
Designing the Trial & Choosing the Field
Split fields versus Replicated Trials
• With split fields it is difficult to tell if any effect is real, or simply due to underlying variation. At the least, test any new treatment in a block with standard on either side, then gauge the variability between standard areas to judge your confidence in the treatment effect.
• Applying treatments in replicated plots takes more effort, but allows greater confidence in the results.
Designing your trial
• There is no single ‘best design’.
• First set the plot size according to the bout widths of treatment machinery, and your attitude to hassle at harvest.
• Plots should be two or more spreader bouts wide when testing fertiliser applications by spinning disc.
• Wider plots are necessary if you want to view treatments with satellite imagery.
• Rotational or cultivation comparisons (e.g. cover crops) normally need larger plot sizes than spray treatments, and are more hassle to replicate.
• Replicate your farm standard treatment at least twice, and ideally replicate all your treatments. The more replication, the more sure you will be of your result.
• Only test the number of treatments that allows sufficient replication within the uniform area available within the field. Avoid testing more than four treatments per trial.
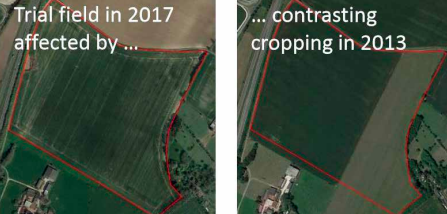
Design of yield-mapping trials
• Plan your harvesting procedure before you finalise your plot size and layout. Aim for at least two full harvest swaths per plot. Wider plots are best if a precise harvesting plan cannot be guaranteed.
Choosing the right field and area
• Choose a field which is big enough, square enough, and even enough.
• Choose a field with suitable soil type, previous crop, variety, etc.
• Avoid fields and areas with recent differences in management e.g. fields previously split (see example below).
• Avoid areas with known problems of drainage or weeds (unless central to your question).
• Exclude headlands and areas which include trees, telegraph posts, etc.
• The trial area should be wide enough to accommodate the trial; using a thin field will limit the number of comparisons that can be made.
• The trial area should be long enough for sufficient yield measurements (ideally >200m) and to maximise the area over which the comparison(s) will be made.
Laying Out the Plots Fairly
Fit with prior patterns of field variation
• Note that ‘natural’ within-field variation in yield will almost always exceed the expected effects of your treatments, so you need to locate your plots very carefully to be as fair as possible.
• Inspect available satellite images (e.g. on Google Earth) and past maps of yield, soil conductivity, nutrients and NDVI, if available.
• If there is obvious variation, arrange the treatment areas so that comparisons will be fair. Ideally any patterns of variation should run across the tramlines, so that variation is not confounded with the treatments.
• Where the likely pattern of yield variability will run at rightangles to your treatments this can be an advantage, as you can see the effect of the treatment across different conditions e.g. soil zones.

Allocate treatments to plots
• Statisticians prefer treatments to be allocated to plots randomly, within blocks of replicates. This is especially important if there is a spatial trend across the treatment lengths.
• There can however be advantages in systematic designs, not least simplicity. We prefer to alternate the standard treatment with the test treatments as above, so that a good estimate of spatial variation can be made, and good comparisons can be made with the standard.
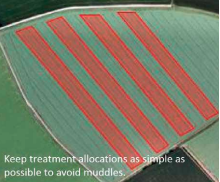
Applying and Recording the Treatments
Mark and record trial and treatment locations unambiguously
• Make a proper record of which treatments were placed where, ideally using mapping software/ apps, or at least using a sketch on a field map.
• It is also worth marking the locations of the plots in the field using canes or flags.
• Tell all those that might be carrying out field operations about the trial and its requirements.
GPS for yield-mapping trials
• To accurately analyse yield mapping data, GPS positions of plots are essential for yield data to be correctly assigned to treatments.
• Your tramline and treatment locations may be recorded accurately on your tractor, but this is often difficult to extract and share.
• Record the GPS co-ordinates of the centre of the tramlines for all the treatment plots where they meet the headlands at both ends of the field.
• Ideally use a proper GPS device with a correction signal (e.g. RTK or EGNOS) as the accuracy of smart phones and sat navs is typically poor (>5m). GPS locations can be displayed in various websites and apps, including http:// gridreferencefinder.com/
Apply the treatments
• Equipment being used for applying treatments should be calibrated.
• When applying treatments, it is important that only the thing of interest is changed so that you can understand what is having an effect on yield. For example, if you are testing a spray, ensure that the different standard and test treatments are applied within a short time of each other and at the same water volume and pressure.
• Apply all other inputs uniformly over the whole field, so that the comparison of your chosen treatment with the standard is not confounded. It is usually best to avoid variable rate fertiliser applications over the trial area.
Crop Protection
Make explanatory measurements
• Depending on your question, it will usually be worth making some explanatory measures (e.g. of disease or by sampling for nutrient analysis).
• The more measurements you take, the more confidence you are likely to have in the outcome of the comparison you are making.
• Point measurements should be in adjacent positions along the length of each plot, georeferenced if possible.
• Effects ‘to a line’ coinciding with the boundary of a treatment can be particularly convincing. Take photos of any visual effects you can see.
• If you are able, it is often worth getting aerial imagery from a drone or plane.
• It is possible to acquire satellite imagery, though free imagery at 20m resolution is unlikely to show treatment differences unless plots are quite wide.
• Spatially referenced measurements (such as drone images) can be analysed statistically to gauge how much confidence you can place in any comparison.
• Keep a dated record of any visual effects of the treatment, or any spatial differences that could affect the results.
Plan for harvest
• Good harvesting is critical for trials whether you are comparing treatments using yield mapping, weighbridge or a yield monitor. Your optimal strategy will depend on the relative widths of plots and combine header, your willingness to harvest discard areas separately, and harvest logistics, e.g. the need to unload on the move.
• Key factors for success are accurate harvester calibration, ensuring full header widths, not cutting across treatment boundaries, and maintaining consistency between plots. Harvest the whole field with the same combine on the same day.
• Yield mapping gives the best confidence that treatments differences are real rather than from spatial variation.
• Using a weighbridge gives accurate weights, but you need accurate measures of the area to get good yields
• Simply using the combine monitor for separate plots can give instant answers, but will be affected by measuring the area in non-full swaths, start and ends of combine runs and shortwork.
Harvesting – Harvesting your trial
• Harvest the headlands first
• Aim to be as consistent as possible between plots. Inclusion of wheelings in the combine swath can depress reported yield by around 0.5 t/ha.
• If not using yield mapping, you must avoid cutting across the treatment boundary in your yield area. If yield mapping, this data will need to be removed from treatment comparisons.
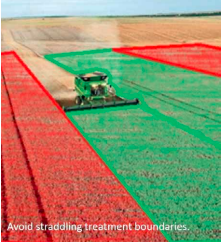
Harvest of yield-mapping trials
• Calibrate the yield monitor according to the manufacturer’s instructions. Ideally test the yield monitor against harvested grain weights over a weighbridge.
• Keep to a constant speed and try to harvest the whole trial under the same conditions and on the same day.
• Harvest in line with the tramlines.
• Keep the combine header full wherever possible, and aim to cut at least two full header widths per plot. A cut with standing crop on either side of the dividers will be fuller than cuts with an edge or wheeling to one side, even though the widths may be assumed to be the same. For example, a 30cm difference in actual swath width on a 10m header can give a 3% difference in calculated yield, around 0.3 t/ha.
• Combine direction can also affect measured yield, especially on slopes or in lodged crops. Extract yield data promptly
• Each combine system is different in the types of files used to store data and how these can be transferred and viewed.
• However, most yield data can readily be imported into farm management software such as Gatekeeper. The data are then relatively easy to export for comparison and analysis.
Keep good records
• Record how you harvested the trial, the time and date, and describe any problems.
• Take grain samples from each plot if appropriate, e.g. for grain protein analysis.
Harvest of weighbridge trials
• Accurate measurement of the harvested areas of each plot is essential for accurate calculation of yield. It is best to compare equal lengths of runs of a known harvested width (e.g. two combine runs per plot). Use good quality GPS tools or a measuring wheel to measure the length.
• If weighing grain from different areas of the field, remember that irregular areas are difficult to measure accurately and may compromise your results.
• If measuring harvested area with the combine yield monitor, avoid non-full headers and adjust width as necessary.

Analysing Yield Mapping Results
Sort out and clean the data
• Remove data from headlands and any values that are clearly aberrant. Various filters are available to remove data where the combine has stopped or changed direction. Also remove data from combine runs that straddled two treatments, or where the header was not full, even if the software has adjusted for width (sometimes an overcorrection is applied).
• Assign the yield data to treatment plots and calculate the mean of the cleaned data for each plot.
• Unfortunately, analysing yield map data from trials is not straightforward in many farm software packages. As an alternative, you can try QGIS mapping software, available free from www.QGIS.org.
Assess treatment effects
• Treatment differences will rarely be visually obvious from the yield maps
• Look at the spatial variation in the field and judge whether this was likely to have affected the comparisons.
• Variation in yields of standard plots can indicate whether treatment differences are real. Any treatment effect needs to be bigger than the difference between standard plots.
• If your treatments were associated with different input costs, you can calculate a gross margin for each plot.
• Remember that an absence of evidence of a treatment effect is not evidence of absence – it may be that your trial was not precise enough to detect the effect.
Drawing Conclusions – Check to avoid false conclusions
• Remember that inherent spatial variation in fields is normally larger than any treatment effect you may have imposed.
• Double-check that yields were assigned to their rightful treatments.
• Was the yield map similar to previous yield map(s) without treatments?
• Some spatial variation is inevitable, but this must be assessed and compared to gauge how sure you can be that a yield difference was really a treatment effect.
• How well did yields of replicates agree? • Consider the counterfactuals and any possible confounding factors.
• Spatial data from other sources, including in-season images and monitoring, should be used with the trial yield data to gauge how likely it is that treatment effects are real.
Share and discuss your conclusions
• If possible, compare your results with those of others. The same trial conducted on another farm or in the subsequent season can build further confidence in the results.
ADAS’ Agronōmics service
ADAS has d e v e l o p e d a process, software and new statistical p r o c e d u r e s so those c o n d u c t i n g farm trials can reach the right c o n c l u s i o n s quickly and easily. This includes;
Geoprocessing to define harvest d i r e c t i o n s , combine runs and distances.
Assignation of data to t r a m l i n e s , treatments and headland areas.
Data cleaning and processing to remove e x t r e m e outliers and anomalous runs, filter data anomalies, and correct for any offset between opposing harvest runs.
Spatial analysis to model spatial variation both related and unrelated to treatments, estimating the average treatment effect(s) and their uncertainties.
Reporting, displaying yields as maps with a standardised colour key and providing clear conclusions.
Meta-analysis of trial series.
For further information, and queries about analysing farm trial data using ADAS’s Agronōmics service, contact agronomics@adas.co.uk
This guide was been prepared by ADAS’s Agronōmics team including Daniel Kindred, Sarah Clarke, Susie Roques, Damian Hatley, Pete Berry and Roger Sylvester-Bradley and they can be contacted on +44 (0) 333 142950
-

Drill Manufacturers In Focus…
DALE DRILLS – MEIR AGRICULTURAL

LAMMA 2019 will see the launch of a new low disturbance Soil Conditioner developed by the team at Dale Drills. As a non-drilling piece of equipment, the Dale’s decided to launch the product under a new brand, Meir Agricultural, named after owners Tom and James Dale’s late maternal Grandfather, Thomas Meir, who worked as an engineer in Teeside in his youth, before taking on the challenge of farming on the plains of Manitoba, Canada in his later years.
The Meir SC has been designed to complement reduced tillage strategies, such as those employed on the Dale’s own farm. ‘Much of the soil we farm is not naturally self-structuring,’ explains Tom Dale. ‘Consequently, it is often a requirement to assist nature to provide optimum drainage through the soil, even in a well maintained soil structure.’ Having tried many other combinations of subsoiler frames and legs, the Dale’s decided that exactly what they wanted didn’t exist. ‘We were looking for a reduced surface disturbance, whilst ensuring effective soil loosening through various depths and conditions as well as maintaining a firm finish. Most legs caused excessive surface boiling, whilst many frames positioned legs in ways that prevented effective loosening.’
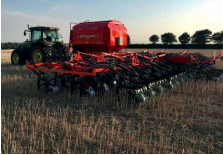
The Meir’s Hardox leg leads are fitted with a 25 mm wide tungsten point at a shallow angle to reduce surface boil. The wing is 140 mm back from the leading tip, this allows the wing to run in a zone of fractured soil, reducing wear and improving loosening. A shallow angle on the wing further reduces potential disturbance in the seeding zone whilst still ensuring an effective loosening in the compacted area below.

Dale Drills – Have it your way
Dale Drills’ award winning range of Eco drills now comes in 4 different layouts each suitable for a different size farm. The tractor mounted Eco-S comes in widths from 3 – 5m and can be fitted with a drill mounted or front mounted hopper. The Eco-M has seen significant interest since its launch at Cereals 2015 and represents the mid-sized offering available in sizes from 3 – 9m. The M utilises a more orthodox layout than their larger machines with land wheels positioned between the 1st and 2nd row of tines whilst the seed hopper is mounted towards the front of the drill to ensure an even distribution of weight.

The Eco-L is designed for high output drilling and is available in sizes from 6 – 9m. With the seed hopper mounted at the rear of the drill and designed to be wide enough to be filled straight from the average forklift bucket, the company say outputs of up to 200ac/day can be achieved with a 9m drill. The new Eco-XL was launched at Cereals 18. The improved layout boasts a stretched chassis with a 6.5 tonne hopper upfront, this allows for an uncluttered folding area with widths up to 13.5 meters achievable. Seed delivery is by a pressurised system ensuring both seed and fertiliser can be easily be blown out to the drill extremities. The XL is available in sizes from 8 – 13.5m and is able to fold down to less than 3m wide and 4m high using a 5 section chassis. Sales since Cereals 18 have seen over 40 meters of drill sold in this range.
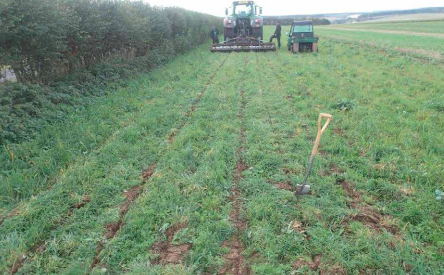
Additional Options
The versatility of the Eco range doesn’t stop at the layout. The drills come as standard with an adjustable row spacing of 12.5 or 25cm, and 50cm as an optional extra. ‘Drilling at 12.5cm allows farmers to increase competition, whilst 25cm reduces disturbance, so the drill can be set to match your preference’, said Director James Dale. A cover crop cutting disc has also been developed over the last 18 months which improves residue flow through the drill, particularly in green covers by cutting a path for the tine to follow. ‘The drill ‘sails’ through thick green cover crops when the cutting disc is fitted, and the tine ensures seed is placed into clean soil. The added benefit of reduced disturbance certainly helps in the battle with blackgrass’, added Mr. Dale.
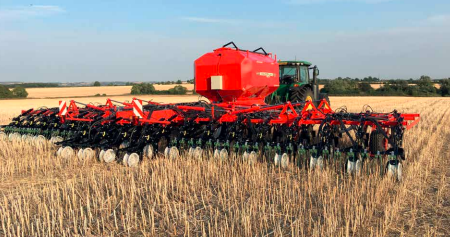
A banded coulter has also been developed which fits straight onto the back of the existing seed knife. Seed can be banded to almost 100mm and fertiliser (either liquid or granular) can be applied down the centre of each band and to a slightly greater depth. The coulter is made from hardened steel and is fitted with tungsten carbide plates to improve durability.
Dale Drills will be showing their extensive range in Hall 20 Stand 20.76 at LAMMA 2019.
-
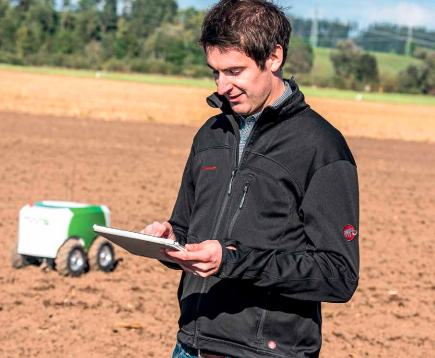
XAVER: Robot System For Planting And Accurate Documentation
After successfully completing the multi-year research project MARS (Mobile Agricultural Robot Swarms) in collaboration with the Ulm University of Applied Sciences and the EU research funding, AGCO and Fendt decided to develop the robot project up to series-production readiness for the Fendt brand.
The entire system, including small robots operating in swarms and a cloud-based system control will now be operated under the product name ‘XAVER’. ‘Xaver’ is a traditional Bavarian name with deep roots at Fendt. In the 1930s, the brothers Hermann and Xaver Fendt founded ‘Maschinen- und Schlepperfabrik Xaver Fendt & Co.’, named after their grandfather Xaver Fendt. Regarding the new robots the name ‘Xaver’ incorporates tradition and the latest agricultural technologies.
Fendt’s new Xaver system uses small robot units operating in swarms and a cloud solution to plan, monitor and accurately document the precise planting of corn. Satellite and data management in the cloud allows navigation around the clock operations, with permanent access to all data. The exact position and sowing time of each seed is accurately recorded. Knowing exactly where the seed has been planted opens up new potential for further processes, since subsequent operations such as crop protecting or fertilising, can be performed precisely at the individual plant. Planning for the required field, for seeds, seed patterns and -density is carried out via the Xaver app.
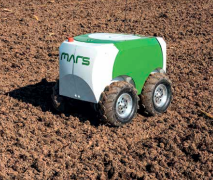
The intelligent OptiVisor algorithm plans the robot’s deployment based on the entered parameters, and calculates the optimal paths for the units involved and the time required for completion of the job. Software updates for the system can be downloaded “over the air”, just as a remote diagnostic can be run conveniently and locationindependt via the smart device.
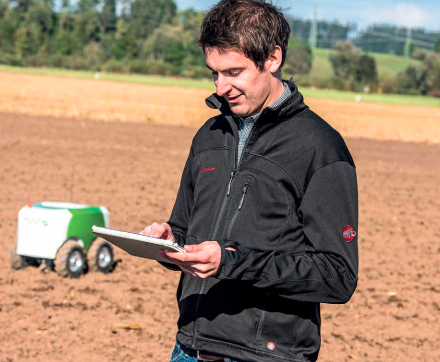
Intelligent fleet management
A key element of the Xaver project is the intelligent management of the deployed robots. For example, a Fendt robot system consists of 6–12 units, and can therefore attain an area coverage of around 1 ha/h. Each robot is in constant communication with the control intelligence. Data buffering and redundant communication help covering breaks in the network coverage. If a robot malfunctions, the paths of all units are automatically reoptimised, and the remaining robots take care of the work. Additionally, a mixed variety of crops can be planted in the field, since each robot can be filled with different seeds.
Resource efficiency and soil protection
Thanks to the battery-operated, electrical motor (approx. 400 W), the low weight (approx. 50 kg), and the autonomous operation, planting can continue round the clock, 7 days a week, even in conditions which conventional machines find difficult, e.g. due to the state of the ground or noise emissions. This increases the productivity and flexibility of the system. In relation to the large tyres, the ground pressure is almost negligible (approx. 200 g/cm²).

The robots need around 70% less energy to do the same work, and accordingly produce less CO2 when doing it. Since neither diesel nor oil is required to operate the robots, there is no leakage and there are no local emissions.
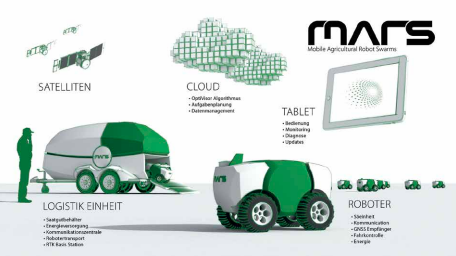
The robots are easy to mechanically assemble, do not use complex sensors, and are therefore highly robust. Their small size and light weight make maintenance easier, and means that the system is intrinsically safe.
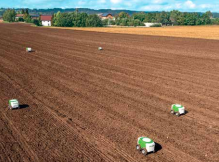
If you were at Agritechnica in 2017 then you will have seen the XAVER robots up close and the static demonstrations. For innovative farmers focusing on precision farming they are certainly of interest. Lets hope that more is unveiled at Agritechnica 2019 with regard to when we will actually see this technology on farm, but it certainly sounds interesting and not that far away.
-
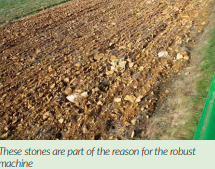
Events In Focus Overbury Estate
Mike Donovan writes…
Joel Williams is a familiar face to many with an interest in soil health and biology, and first spoke to a UK farming audience in 2010. The Australian plant and soil health educator has a global audience and Direct Driller magazine caught him at the Overbury Estate in Worcestershire where he joined the estate manager and no-till enthusiast Jake Freestone and also Simon Cowell, a long term no-tiller who farms heavy land in Essex who was voted Soil Farmer of the Year 2018. The day provided a mass of information both in the field and from the podium for farmers thinking of transitioning to no-till as well as others who have already made the change. The event was superbly organised by QLF, quality liquid feeds, who have developed the foliar product Boost which is used by both featured farmers.
Joel provides workshops and consultation on soil management, plant nutrition and integrated approaches of sustainable food production as well as giving soil-based talks for farmers, advisors and others. At university he specialised in plant and soil dynamics and he has a particular interest in managing soil microbial ecology along with crop & soil nutrition to optimise plant immunity, soil function and soil carbon sequestration.
In the last few years he has been working in the UK and Europe with both conventional and organic farming systems, integrating soil chemical & biological assessments and in addition integrating plant nutritional analyses as a joined-up strategy for managing crop production. In the UK he was a headline presenter at the 2018 Groundswell Show in Herts and in the year did two presentations in Herefordshire and others in Sussex and Derbyshire, Haddington and Perthshire in Scotland, Northumberland , Shropshire and Tullamore, Ireland. He has enthusiastic audiences in Australia, UK, Ireland, Netherlands, Latvia, South Africa, Kenya, Canada and the US.
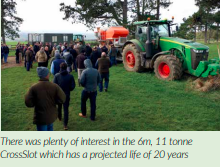
At the podium Joel is a convincing speaker who talks with his hands, while in the field he is often in the bottom of a soil pit explaining what is revealed to an audience around the edge. Soil, its use and misuse, is his passion but the MSc he is currently doing in Canada is in the wider area of Food Policy, illustrating his belief in the need to acquire a wide knowledge of the whole business of food supply. Joel has a wide understanding of the issues surrounding soil, the way farmers use it its biology and science.
The breadth of knowledge means that he has a suite of soil subjects within his expertise. “We live in exciting times in farming, as the industrial, ecological and agrarian factors of farming overlap to produce production systems, and the question of ecology is introduced at any part of the spectrum.” The third is ecology which is described by diversity conservation and the ecosystem. This is the leg which Joel considers most neglected. While the industrial or conventional farming contributes to the deterioration of soil components, including water quality and sustainability, the agrarian system relies on natural processes. Joel spends time exploring the area between the two, proposing farmers maximise the use of the natural processes which the farmer can harness to substitute for a proportion of artificial inputs.
Plant nutrient sources and supply
There are two basic sources: chemical and natural. Soil health is the provider of natural sources of nutrients, so the farmer who understands the mechanism of soil will have the tools to stimulate natural organisms that improve nutrient production. Soil health equals plant health and vice versa. Plants absorb nutrients fast, foliar feed getting to the roots in about an hour. Farmers using foliar products are advised to spray in the early morning for best take up.
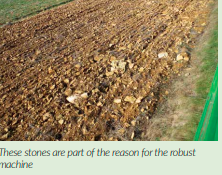
Joel explains that the UK, along with many other countries, has a history of over-application of nutrients, and says this is due to a focus on N, P and K and a disregard micro-nutrients and a casual interest trace elements. He explains that all components are needed if the soil’s potential is to be made available for the crops being grown. Smaller quantities of micro-nutrients may be needed, but their importance is equal to other elements. Healthy soil with adequate supplies of Mo, Fe, Ni and Co are able to feed healthy bacteria that are able to sequester N from the air as well as creating the right growing conditions for N fixing legumes and clovers. The science applies to all plants, and he stressed the importance of molybdenum.
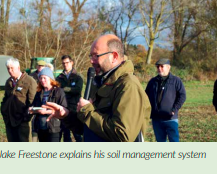
Tissue tests can mislead. Testing for total N doesn’t reveal levels of amino acid and the tests can show an N deficiency when the actual problem is in the trace and micro elements. Adding N from the bag will be far less efficient Soil biology is combined with soil physics and soil chemistry in creating a productive medium for crop growth, and Joel underlines the importance of all three, and explains that each has an influence on the other two. Chemical changes affect the physical structure as well as the biological activities; physical changes like compaction affect the biology and the chemistry… Joel focusses on soil biology because it is less well understood than the others.

Most are aware of the huge number of living organisms, from the primitive algae which are the first form of life, to bacteria and fungi, protozoa (the single-celled microscopic animals, which include amoebas, flagellates, ciliates, sporozoans, and many other forms); nematodes; arthropods which include spiders and other invertebrate insects; other insects like centipedes and others; and earthworms. Soil carries billions of organisms which work together in what is called the soil food web, where carbon is the common denominator. Bacteria and fungi break down the organic matter by feeding on it and incorporate it into their biomass.
Up the chain and the critters are feeding on organic carbon and excreting it, breaking it down. At the top of the chain are creatures which eat each other producing dung for bacteria and fungi to enjoy. Mycorrhizal fungi is of major importance for plants as they are attached to the roots and contribute to plant development by being fed the sugars and carbohydrates which are the product of photosynthesis and in return feeding the roots mineral and organic nutrients needed for plant growth. Mycorrhizal fungi exist in nearly all soils and provide a secondary root system for the plant, a wider and efficient network attached to the plant’s roots with spreading spidery arms extending beyond the plant roots. These fungi can increase the plants access to soil volume from ten to a thousand percent, and so increasing water absorption, plant size and production.
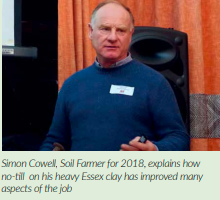
Further up the chain the protozoa
Nematodes are well know to farmers and growers. Root feeding ones feed on the sugars from roots having first punctured the root with a stylus. Beneficial ones scoop up bacteria and feed on it, others feed on fungi having a straw like structure,and others again that feed on other nematodes. Each process excretes waste products which are then available to the the plants. The process creates nutrients which can be measured and analysed. Some nutrients are highly soluble and almost instantly available to the plant once connected to the root structure. Less available are the exchangeable nutrients which will take a short time to become available.
The third category, the insoluble ones, can move down the soil strata and will, in time, change their nature and become available. When a soil test shows a deficiency of soluble nutrient the temptation to add more from the bag is compelling, but in reality the soil may well have enough nutrient, but lack the means of accessing it. More biological activity would bring the nutrients above the root zone and closer to the surface to allocation where they can be used.
Farm tour of Overbury
The group of 90 toured the higher land at Overbury and Jake Freestone explained that the management moved towards no-till in 2003 and has since taken up cover cropping and companion planting. The first field we saw has been no-till since 2012 and undressed Cruse wheat was coming through well. The crop had some Zn and Mg and 15 t/ha of FYM in addition to the pea residue. Blackgrass populations are in decline and the aim is rouse minimal insecticides. One of the visiting farmers named Ken put forward the idea that their neighbours’ use of the product provides protection, but Jake’s view is that as soil condition improves so the crop condition is raised and so become stronger and more resistant to insect damage. Rotational grass is used to clean land. They use a soil penetrometer to measure soil compaction and provide some comparative data of soil resistance at differing depths, and on the day of the visit we found that there was little difference between measurements in and out of the tramline. They also measure water infiltration using a drain pipe
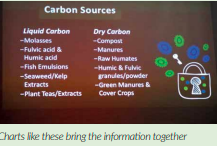
The three tractors and tour trailers climbed right to the top of Bredon Hill passing a large area of stoney brash to where the 6m CrossSlot direct drill was parked. Jake explained that the hugely robust machine was designed for New Zealand conditions where farmers were regularly tackling stony ground, and the expense was justified by the expected 20 year lifetime of the machine. The drill can handle four products at a time, with two hoppers with air, so it can do a main crop and granular fertiliser. Two side pods are used for small seeds, slug pellets and other product that is spread at a low rate. The drill weighs 11 tonnes and the tractor 9t, and the fuel is 13 – 15 litres /ha. Jake’s straw policy varies with the field. It is baled and removed before osr because of the slug challenge.
Simon Cowell, judged Soil Farmer of the Year for 2018 provided a fascinating account of working some of the heaviest clay on the Essex coast. His farming has involved working with soil to improve plant performance, and this has involved numerous trials of ideas he thinks might work. The result is that his growing medium has improved hugely. “The soil has lost its stickiness and it is 20 years since we have applied any phosphate. The farm carried a dairy herd and after each grazing we would put on some more nitrogen, just as we were told to do. Grass now grows as well without the top dressing of N.
Simon explained the plant hierarchy and how their nutritional needs change dependent on their place in the list. Moving the soil composition up the scale through the use of compost has resulted in a noticeable reduction in blackgrass which has been a major problem on these bacterial soils. The compost has reduced the germination of weed seeds and has meant that Atlantis is now working again. Simon says that the no-till system keeps the soil aerobic, while working these soils with tines and power harrows breaks the structure and causes slumping.
“I see the compost heap providing an inoculant rather than a fertiliser or soil conditioner. The compost provides a home for good bacteria and fungi which then help feed the cash crop.” The compost is mixed with a bespoke machine rather than a fork and the stirring increases both carbon and nitrogen levels. The heap is kept at 70C and is left to stand for a year. He makes the most of horse compost, ditch soil and plasterboard. Fed this way the crops tend to have stronger straw, deeper roots while plots given regular fertiliser have softer tissue making it easier for destructive fungi and insects to attack.
Every field has a ‘holiday’ by being down to lucerne for three years. The crop goes to local company Dengie crop driers and the plants get a chance to drive their roots deep into the soil – they can go as deep as 45ft and more. While conventional farmers would break up the root network created by these roots, by leaving them well alone Simon preserves the matrix of pores which aid drainage and provide new roots with a highway rich in fungi and bacteria from the rotting roots. The field surfaces are better able to carry farm traffic and the need for ultra flotation tyres is now much reduced. Simon also trialled the effect of fungicides – stopping using them on some fields – and found they were depressing yields. So while they reduced disease they had side effects.
He also has developed his own wheat mix blend, choosing 4 varieties that are unrelated and mixing them prior to drilling. The next year’s crop comes from home saved seed, and this has now continued for five years. He was interested in how this mix compared with seed from KWS and was pleased to see his mix performed well. He has done other trials into N and concludes that often the plant needs a combination of trace elements and bacteria in addition to the N feed. “The processes we are dealing with are far far more complex that is presented in textbooks and by experts.” Simon describes the trials as ‘addictive’ and the information gained is always worth more than the money spend on doing the work.
-

Conference Highlights Calcium’s Vital Role In Soil Nutrition

10th October 2018 – At Nantwich Football Club
Calcium has a key role in maintaining healthy, fertile soils and the production of high-quality crops and forages. Yet it is estimated that 60% of UK soils are below optimal levels of pH and calcium, and the importance of this key nutrient is often overlooked. To help put calcium under the spotlight, granulated lime manufacturer, Calcifert, hosted the UK’s first Calcium Conference back in October. The event attracted an audience of more than 100 agronomists, arable producers, soil specialists and livestock farmers; highlighting the wide range of applications that calcium has within the agricultural sector. Whilst the day’s seven speakers tackled a diverse range of subjects – from the practicalities of measuring calcium levels in soil, to interpreting calcium test results – what was clear from all of the presentations is just how important-a-role calcium has on plant growth and soil biology, and that this should be of significant interest to arable farmers.
Ian Robertson urges detailed approach to soil testing
Agronomist and managing director of Sustainable Soil Management, Ian Robertson, highlighted the need for detailed soil testing before decisions on nutrient inputs are made. Ian’s presentation looked closely at both the importance of calcium to plant health and cell wall development, but also calcium uptake and how much of this vital element needs to be supplied to a plant. Ian advocates carrying out more than a simple pH,P,K and Mg soil test, as focusing on these elements alone may not be enough to improve soil conditions. The four major cations (Ca,Mg,K,Na) should always be included as part of a test.
Calcium is a major component of any soil test, but a simple PPM result is not enough to inform a nutrient program. A soils Cation Exchange Capacity (CEC) should also be determined to help balance the cations in a soil in order to achieve the optimum soil pH and soil structure. An understanding of both available and total calcium in the soil, which can be matched to crop demand, will improve production and health. As well as reminding the audience that pH is not the measure of calcium and consideration of other cations was vital, Ian also emphasised the importance of CEC and its relation to soil calcium results. Ian’s overarching message when it comes to calcium recommendations is a straightforward one – a simple calcium analysis will not provide you with all the information needed to make an informed decision when formulating a soil nutrient program.
Calcium in a zerotill system
As part of the afternoon session, Clive Bailye, managing partner at TWB Farms, shared the importance of calcium within his zerotill farming system. Clive has used a zerotill system for 10 harvests, judging it to bring both financial and environmental sustainability to his business. According to Clive the only way to achieve healthy crops is through healthy soil, and the factors he believes make the difference between success and failure are soil nutrition, rotation and attitude – not soil type or machinery. Recognising calcium’s key role to soil nutrition, Clive pays attention to understanding what calcium requirement his soil needs and uses pH zone testing to compensate for the highly variable pH in his soils.

High quality ground Derbyshire limestone is used for bulk calcium applications ahead of spring cropping. Where a maintenance dressing is required to keep pH at the required level, Clive applies 100kgs per hectare of Calcifert Lime in spring, running machinery along existing 36m tramlines. In his presentation Clive highlighted an issue with acidic phytotoxins, which had been identified in wet anaerobic conditions. To help prevent seedling damage, Calcifert Lime is also applied at drilling with the help of a modification to the drill.
Clive’s key message for all growers was to use calcium to flocculate the soil; restoring its natural aerobic environment and enabling the soil biology to thrive with the aid of the available calcium. Summarising the messages from speakers at the conference, agronomist and conference chair, Mark Tripney, encouraged farmers to challenge the norm when it comes to soil testing, and in particular calcium testing. He concluded that only by carrying out detailed analysis can you really strive to achieve a better balance of nutrients and ensure you get the most from your soil.