Written By Laura Barrera and first published on Agfuse.com
While soil health may be harder to quantify than benefits like biomass production or input savings, there are ways of measuring how cover crops are making a difference in your soil.
While there are numerous reasons for using cover crops, a primary one is improving soil health. In fact, it’s the one benefit most farmers using cover crops have experienced: In the most recent US Cover Crop Survey Annual Report, of those who rated the statement, “Using cover crops has improved soil health on my farm,” 86% agreed or strongly agreed.
The report notes that it’s interesting and heartening that “soil health reflects an embrace of a long-term, hard-toquantify benefit of cover crops, and that for the past two surveys, it has achieved the top spot by garnering 86% of the responses.”
1 – Reduced erosion
Protecting soil from wind and water erosion is a common reason growers begin using cover crops. The easiest way to monitor this benefit is simply by looking for signs that less erosion is occuring. Diane Stott, National Soil Health Specialist for the USDA NRCS’s Soil Health Division, says you can visibly notice less erosion by seeing how little runoff there is from a field after a rain or strong wings. If you have tile drainage, it should be relatively clear after a rain.
But to quantify a reduction in erosion, Stott says you place use stakes with measurement marks at the edge of your fields, preferably with one stake in a nearby field that’s not in cover crops for comparison. Over time, you can check those measurements on the stakes to see how little soil you’re losing, if any, compared to the fields that are bare.
Stott notes that it doesn’t take much for a significant amount of soil to be lost. In fact, if a field loses as little as ¼ of an inch of soil per acre, that’s 10 tons of topsoil gone. “I have seen fields where people who have been in cover crops for a number of years, compared to their neighbours who have not, and it’s frightening the amount of difference there is in the level of soil between the two,” Stott says.
2 – Less compaction
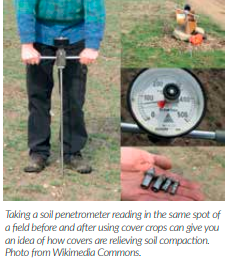
Another soil health benefit you should see after using cover crops is less compaction and deeper root penetration, especially if you’re seeding species like daikon radishes, which are known for growing a deep taproot. To measure soil compaction, you’ll need either a penetrometer, a soil probe or a steel rod, Stott says. If you’re looking for more precise measurements of your soil compaction, you’ll want to use a penetrometer. Which measures the soil’s compaction in pounds per square inch (psi).
In a Penn State Extension article written by soil scientist Sjeord Duiker, he recommends using the penetrometer when the whole profile is at field capacity, which is approximately 24 hours after a soaking rain. Spring is the best time of year for this, he says, because the whole profile will have been thoroughly moistened during the winter. He notes that if the soil is too wet or too dry, compaction could be under- or overestimated, respectively.
Some other things to consider when using the penetrometer are the tip options. In a YouTube video by University of Wisconsin Integrated Pest and Crop Management, soil scientist Francisco Arriaga explains that there is a ½-inch tip and ¾-inch tip. The ½-inch tip is generally used on soils that are harder, while the larger tip would be used for soils that are looser and have better structure
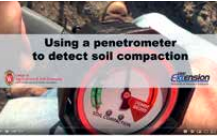
To take a soil compaction reading, Arriaga recommends first taking a reading in a fencerow or somewhere with the same soil type hasn’t had any traffic on it, which would give you a good comparison of the soil’s natural compaction. Push it in the soil and watch the gauge to see how much pressure is required to get through. The easier it is to push, the better your soil structure is. You can return to the same spots in the field year after year to perform this test and see how the cover crops are alleviating soil compaction. Stott says that if you’re seeding a cover crop mix that contains 30-40% radishes, you should see a difference after just one year. She also notes that covers are best at alleviating plow pans and compaction that was formed by equipment, livestock or tillage. Cover crops may not be able to alleviate diagnostic compacted layers that are natural in the soil.
3 – More earthworms
Earthworms are another indication of good soil health that you can measure, as they “need moist soils that have sufficient residue or organic matter for food,” writes Christina Currell, a water quantity educator for Michigan State University Extension. You can do earthworm counts to see if your populations are increasing by digging out a square foot of soil one foot deep, and counting the number of worms found, Currell says. To count for deep-burrowing worms, you could also level out the bottom of the hole and slowly pour a solution of 2 tablespoons of mustard powder dissolved in 2 litres of water, which will cause them to come to the surface within 5 minutes.
Currell points out that if earthworm counts are taken when the soil is dry, your number is likely to be lower, and populations are typically higher in areas with high organic matter. You should try to do your counts in a spot that’s a good representation of the field. She recommends doing the test several times during the growing season and to get an average count. Stott notes that if you’re located in a northern area, you shouldn’t be too worried if you don’t see too many earthworms.
“Understand that, especially in the northern states, earthworms are not indigenous,” she explains. “Most of them have been seeded. Anything that’s from a glaciated area, the earthworms are not native. So don’t worry if you don’t see any earthworms, it does not mean your soil is bad.” Instead, she suggests looking for other beneficial species and see if you notice an increase in populations as you continue cover cropping.
4 – Faster Water Infiltration
As cover crops help lower your erosion and compaction, while also increasing earthworm populations, your soil’s water infiltration rate should improve as well. To measure your infiltration rate, Stott recommends taking a No. 10 coffee can with both ends cut out and placing it in the soil. Pour two inches of water into the can and time how long it takes for the water to seep into the soil. The longer you use cover crops, the faster your water infiltration rate should be.
5 – Higher organic matter
Along with infiltrating water faster, cover crops should also help your soil’s waterholding capacity, as it increases the soil’s organic matter. According to the NRCS, organic matter holds 18-20 times its weight in water, which means 1% of organic matter in the top 6 inches of soil holds approximately 27,000 gallons of water per acre. Measuring organic matter just requires a soil test, but Stott warns that it’s going to take longer for growers to see a significant change in their organic matter percentages.
That doesn’t mean that soil organic matter isn’t increasing — just that it takes a while for the tests to detect those changes. Stott says you’re not going to see a significant change in your soil test values until there’s been at least a 0.3% change in the soil. If you’re in the Midwest, it’ll probably take 3-5 years to see your organic matter levels increase on your soil test results, she says, and if you’re in a drier region you may not see any significant changes for 5-10 years.
Because of how long it takes to see a change, Stott recommends taking a soil test before you start using cover crops to get a baseline number, but don’t test it again for another 5 years. In the meantime, look for qualitative changes to your soil for verification that your organic matter and soil health are improving.
6 – Better soil stability
One qualitative measure you can take to see how your soil health is improving is the Slake Test, also known as the Soil Stability Test.
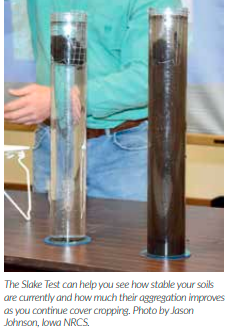
The Slake Test, measures the stability of soil when exposed to rapid wetting, adding that soil stability serves as a “qualitative indicator of soil biological activity, energy flow and nutrient cycling.” To perform the Slake Test, you’ll need two glass jars, wire mesh that can be hooked onto the glass jars, and a chunk of soil from your fields, as well as some soil from another area that can serve as a comparison. The NRCS says this can be from a grassland, fencerow, or notilled field, if you’re not no-tilling.
The Slake Test: This compares how soils hold together when wetted. The soil samples are held in a wire cage which is in the top part of a vertical jar of water. The jar stands for some hours and the test is to see how quickly the soil disapates in the water. The faster this happens, the less stable the soil. Low stability soils get lost through field drains and erode from the surface run off. For a visual on how the Slake Test is done, scan the QR Code below with soil scientist Ray Archuleta using it.
Another simpler qualitative measurement similar to the Slake Test is to spray the soil aggregates found clinging to roots. Stott says to place the aggregates in a dish and spray water on them. You’ll see if the aggregates hold together or if they fall apart.
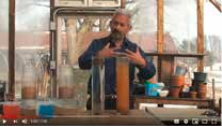
You can continue performing these m e a s u re m e n t s over time to see how much your soil structure improves from cover crops.

7 – Visual Changes
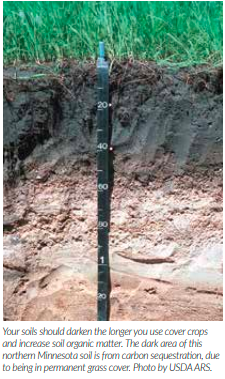
Finally, one of the easiest tools for observing how your soil health is improving is the shovel. Stott recommends digging 1-2 feet deep in your soil to examine the color of it, how deep roots go and how soil aggregates are clinging to the plant roots. The color of your soil should be getting darker, she says, and you should see more soil aggregates near the soil surface. “They’ll start seeing a marked increase in that nice crumbly feel in their soil,” she explains, noting that this can occur as soon as the first season after using cover crops for growers in more humid regions”
If possible, it’s a good idea to do this before you start cover cropping, she says. She also recommends digging in a fencerow that you can compare to your field, so you get an idea of the condition of your soils and how close or different they are from their natural state. “You can learn so much that way and it’s a lot cheaper than sending things to the laboratory,” Stott says. To better track how these changes progress, take videos and photos so you have a way to compare how much your soil health improves.
